Web
- SDK Details
- Guide
SDK Details
1. Install
npm
npm install @perceptinsight/percept-js
yarn
yarn add @perceptinsight/percept-js
script tag
This SDK is also available through CDN. Copy the below script tag and paste before the </head> tag of every page you want to track.
<script type="module">
    import Percept from "https://unpkg.com/@perceptinsight/percept-js?module";

    Percept.init("Your Project Token");
</script>
Once the script is loaded, you can use window.percept to access the methods
2. Initialize Percept SDK
import Percept from "@perceptinsight/percept-js";

Percept.init("Your Project Token");
init method takes an optional initOptions param as second argument which can be used to configure auto tracked events and other settings.
initOptions properties:
| property | required | type | default value |
|---|---|---|---|
autoTrackPageviews | false | boolean | true |
autoTrackRuntimeErrors | false | boolean | true |
autoTrackWebvitals | false | boolean | true |
autoTrackApiCalls | false | boolean | true |
autoTrackStaticResourceCalls | false | boolean | false |
apiTrackingBlocklist | false | string | string[] | [] |
autoFlushThresholdMs | false | number | 5000 |
autoFlushBatchSize | false | number | 50 |
autoCaptureClicks | false | boolean | true |
enableLogs | false | boolean | false |
enableHeatmap | false | boolean | true |
enableHotspot | false | boolean | true |
enableExperiment | false | boolean | false |
experimentFetchedCb | false | function | undefined |
experimentRefetchIntervalMin | false | number | undefined |
callbacks | false | function[] | [] |
3. Set user id
After successfully initializing the SDK, On login set User id using the following function.
await Percept.setUserId('U1');
NOTE: This is an asynchronous call
4. Set user properties
use setUserProperties method to set properties on the user profile created by setUserId
// first call this method
await Percept.setUserId('U1');

// sets user `isVerifiedAccount` property to true
Percept.setUserProperties({isVerifiedAccount: true})
We expose some default user property keys in PERCEPT_DEFAULT_USER_PROPERTIES_KEYS. Please use them as this helps in standarization and usage in the Engage feature provided by Percept.
import Percept, {PERCEPT_DEFAULT_USER_PROPERTIES_KEYS} from '@perceptinsight/percept-js'

// first call this method
await Percept.setUserId('U1');

// sets user `phone` property to '123456789' and `isVerifiedAccount` property to true
Percept.setUserProperties({[PERCEPT_DEFAULT_USER_PROPERTIES_KEYS.PHONE]: 123456789, isVerifiedAccount: true})
5. Send Event
Let's get started by sending event data. You can send an event from anywhere in your application.
// Track only event-name
Percept.capture('Referral Banner Click');
// Track event-name with property
Percept.capture('Screen View', {'screenName': 'Homepage'});
6. Timing Events
You can track the time it took any action to complete using timeEvent method. Calling this method will mark the start of the action and subsequent call to capture method will mark the end. The time duration is recorded in pi_timed_event_duration property.
// Start the time for the event 'Image Upload'
Percept.timeEvent('Image Upload');
// ... some time later. This call capture the 'Image Upload' event with 'pi_timed_event_duration' property
Percept.capture('Image Upload');
7. Set Global Property
Set global property which will be passed with all subsequent events
Percept.setGlobalProperty('global-property-key', 'value');
8. Remove Global Property
Remove any previously set global property
Percept.removeGlobalProperty('global-property-key');
9. Get all global properties
Get all global properties
Percept.getAllGlobalProperties();
10. Clear
Call clear function on logout to delete all user related information
await Percept.clear()
Events auto tracked by sdk
1. Page Views with utm params
Page views are auto tracked as $pageView event. It can be disabled by setting autoTrackPageviews to false in init options.
It has url property. Following properties are also available when found in url:
utm_source, utm_medium & utm_campaign\
2. Web vitals
Web vitals are tracked as $webVitals event. It has following properties:
pi_metric_id
pi_metric_name - CLS/FCP/FID/INP/LCP/TTFB
pi_metric_value
pi_metric_rating - good/bad/needs improvement
pi_metric_navigation_type
pi_metric_debug_target - origin target if available
url - the page from which this metric was captured
You can read more about web vitals here: https://web.dev/articles/vitals
3. Unhandled runtime errors
Unhandled runtime errors are tracked as $unhandledError event. It can be disabled by setting autoTrackRuntimeErrors to false in init options.
Following properties are available as part of this event:
| property |
|---|
| pi_unhandled_error_event |
| pi_unhandled_error_url |
| pi_unhandled_error_line |
| pi_unhandled_error_col |
| pi_unhandled_error_stack |
| pi_unhandled_error_msg |
| pi_unhandled_error_name |
| url |
4. Network calls
Network calls are tracked as $fetch event. It is disabled by default and can be enabled by setting autoTrackApiCalls to true in init options. Percept Insight only tracks fetch/xhr calls and static resource calls are not tracked.
You can ask Percept Insight to not track certain api calls by passing the relevant url string/regex or string array in apiTrackingBlocklist parameter in init options.
Following properties are available as part of this event:
| property |
|---|
| pi_fetch_url |
| pi_fetch_status_code |
| pi_fetch_request_type |
| pi_fetch_successful |
| pi_fetch_time_taken |
Handling Experiments
1. Enabling Experiments
To enable experiment tracking, set the enableExperiment option to true in the initOptions. You can also specify a callback function to handle the experiment data when it is fetched.
const initOptions = {
  enableExperiment: true,
  experimentFetchedCb: (data) => {
    const { experimentData, experimentUserType, isExperimentDataResolved } = data;
    if (isExperimentDataResolved) {
      console.log('Experiment data fetched:', experimentData);
    } else {
      console.log('Experiment data could not be resolved.');
    }
  },
  experimentRefetchIntervalMin: 10, // Refetch experiment data every 10 minutes
};

Percept.init('Your Project Token', initOptions);
Note: The experimentRefetchIntervalMin option sets the interval in minutes for automatically refetching experiment data. The interval must be at least 5 minutes. If a value less than 5 is provided, it will be automatically set to 5 minutes and a warning will be logged.
2. Fetching Experiment Data
You can fetch experiment data at any time using the getExperiment method. This method returns a promise that resolves to the variant data for the specified experiment.
const experimentName = 'example-experiment';
const variant = await Percept.getExperiment(experimentName);

if (variant) {
  console.log(`User is in variant: ${variant}`);
} else {
  console.log('No variant data available');
}
3. Refetching Experiment Data
If you have set the experimentRefetchIntervalMs option, the SDK will automatically refetch the experiment data at the specified interval. You can also manually refetch the experiment data using the refetchExperiment method.
await Percept.refetchExperiment();
4. Getting All Active Experiments
You can get all active experiments and their variants using the getAllActiveExperiments method.
const activeExperiments = await Percept.getAllActiveExperiments();
console.log('Active experiments:', activeExperiments);
5. Getting Experiment User Type
You can get the user type for experiments using the getExperimentUserType method.
const userType = await Percept.getExperimentUserType();
console.log('Experiment user type:', userType);
Initialisation
Step 1
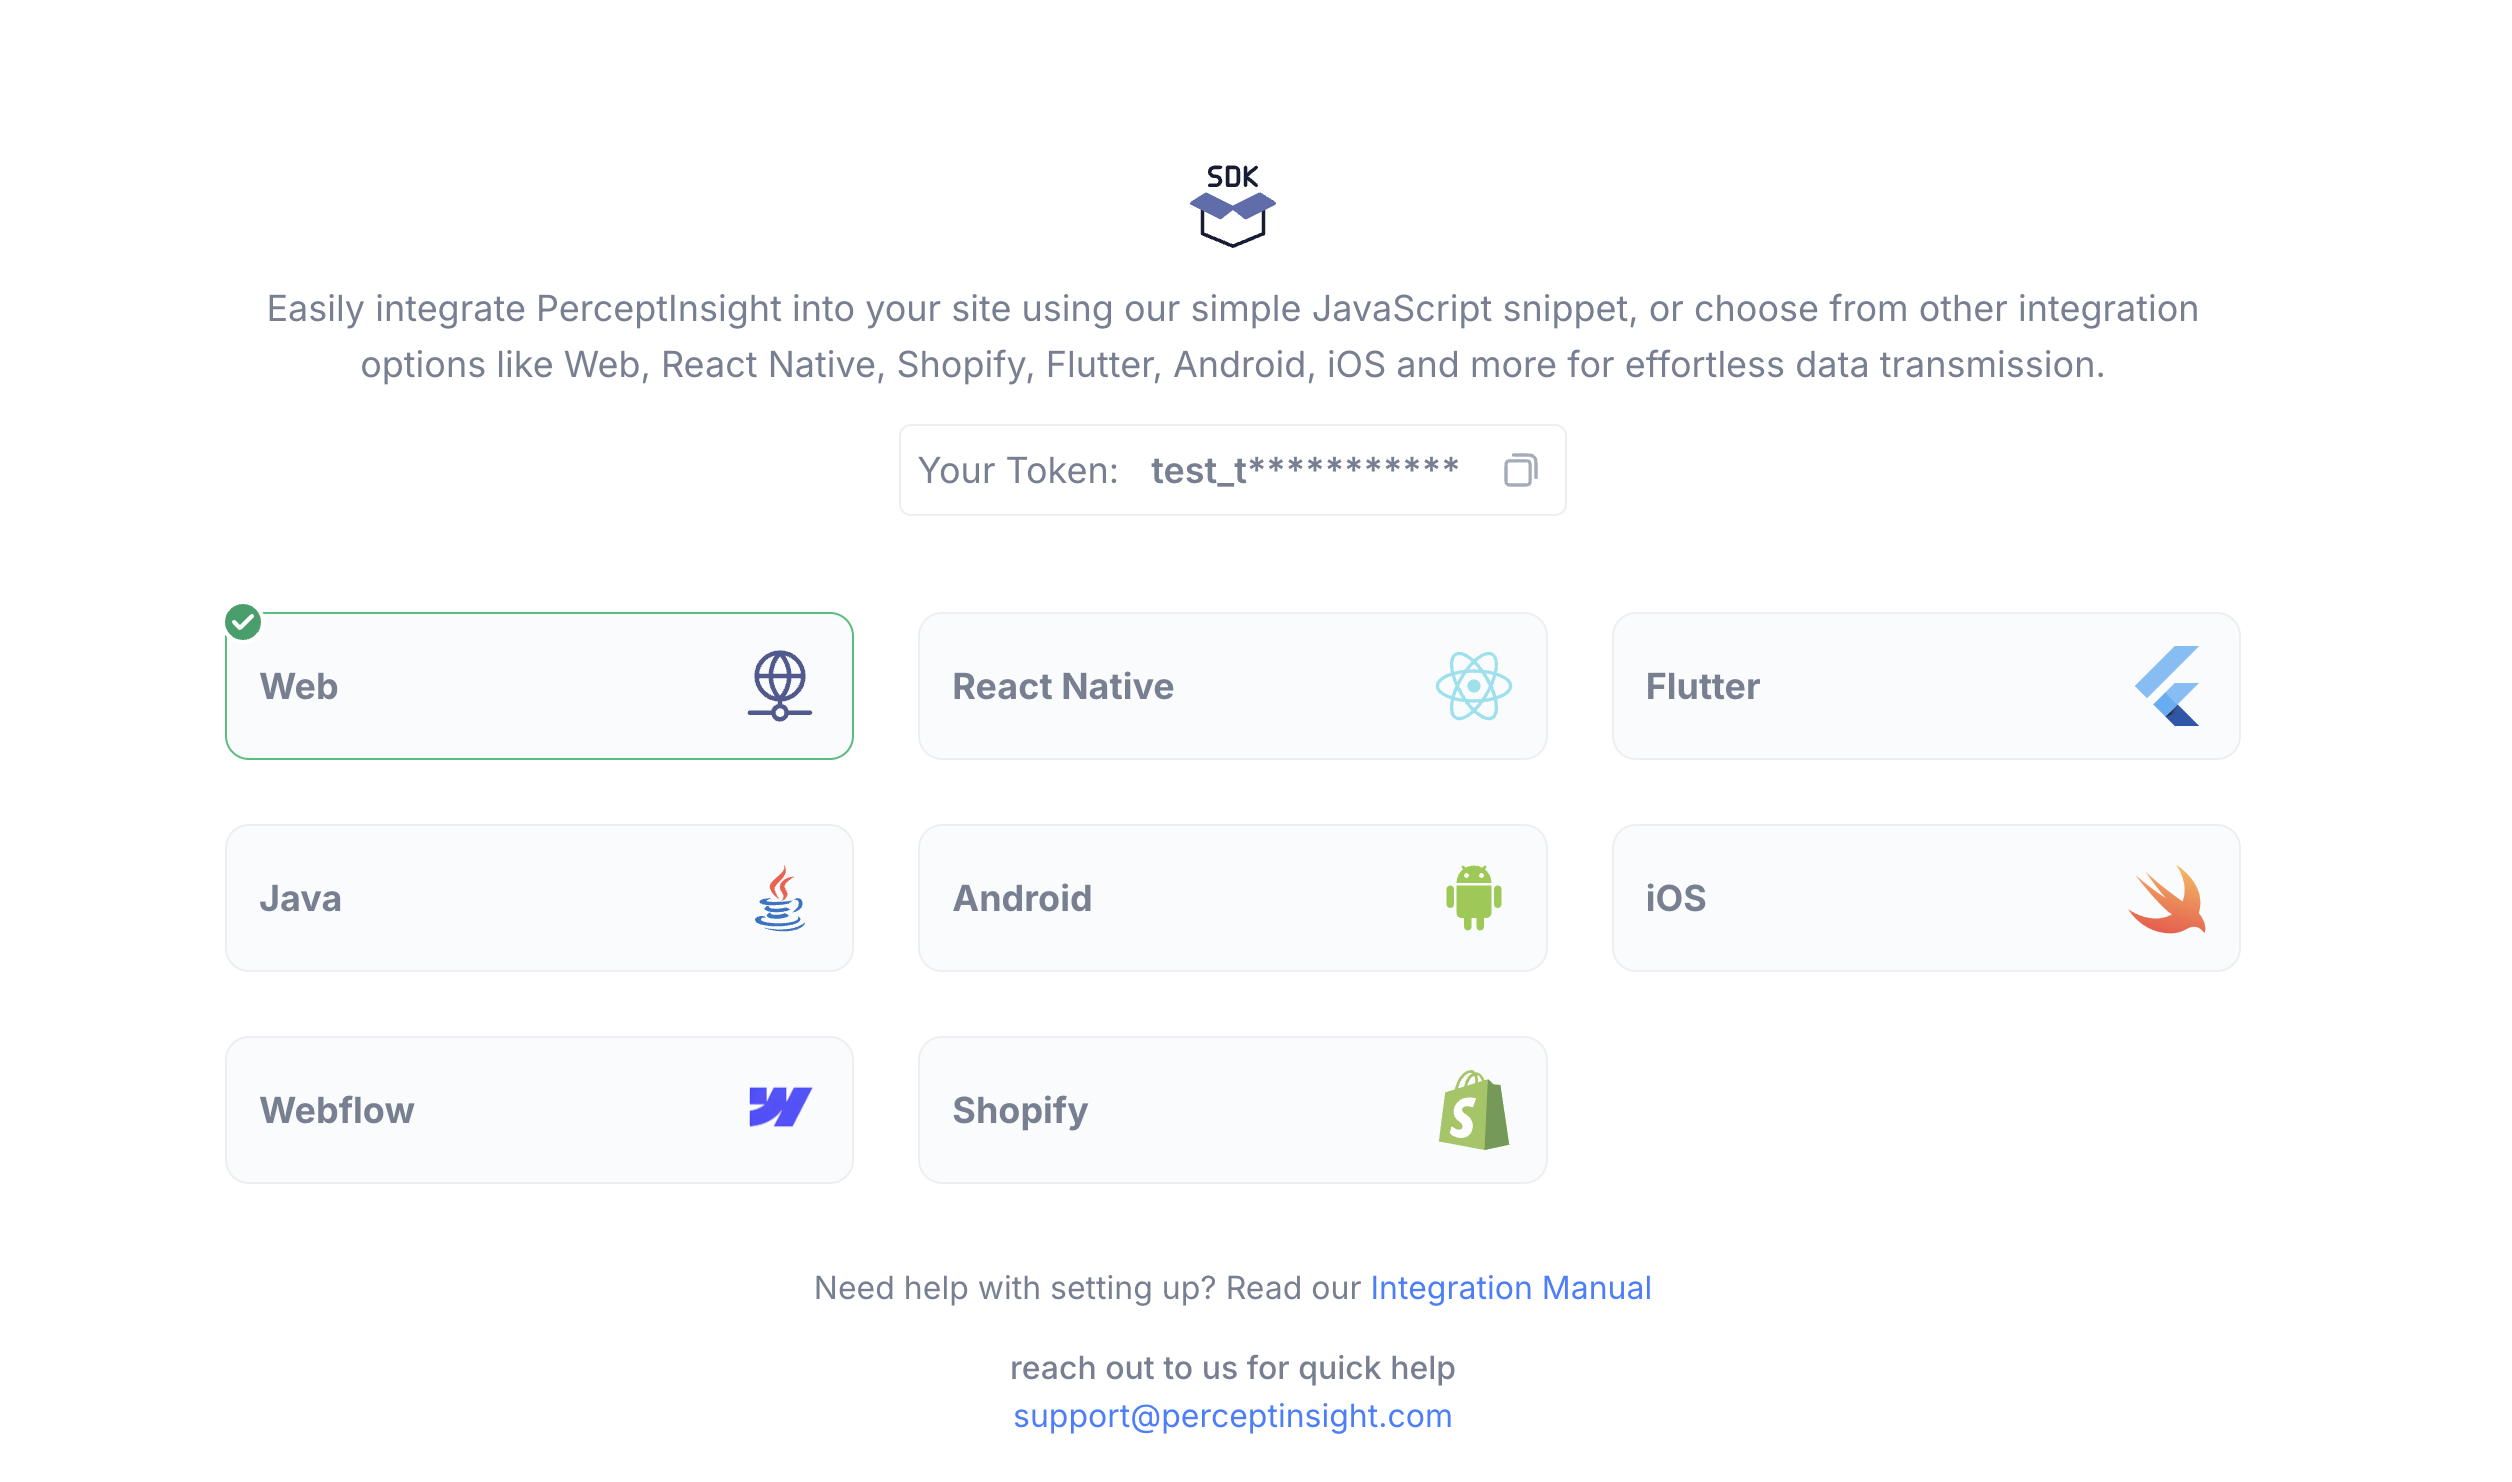
Once you login please choose the client technology with which your website / app is built. For our demonstration purposes we are choosing a Web SDK.
Step 2
Simply copy the code as instructed in the page. Make sure that you are using your auth token that would have been provided as part of your code and not the illustration auth token.
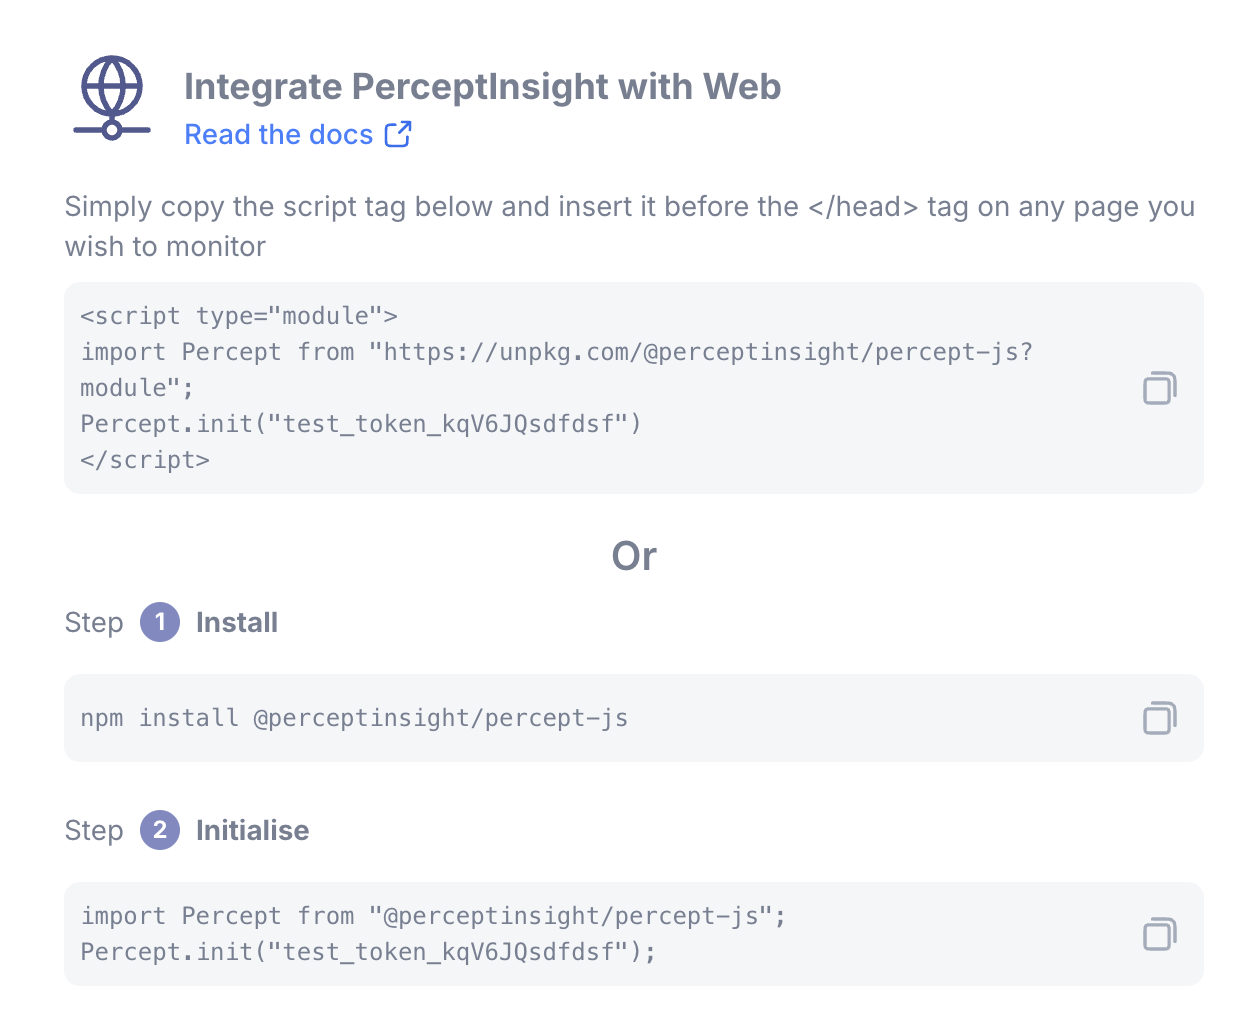
Code will look like below once you copy (make sure that the auth_token is the one that is provided from your login)

<script type="module">
  import Percept from "https://unpkg.com/@perceptinsight/percept-js?module";
  Percept.init("your_auth_token");
</script>
Step 3
Next open any text file editor of your choice and paste the following lines of code
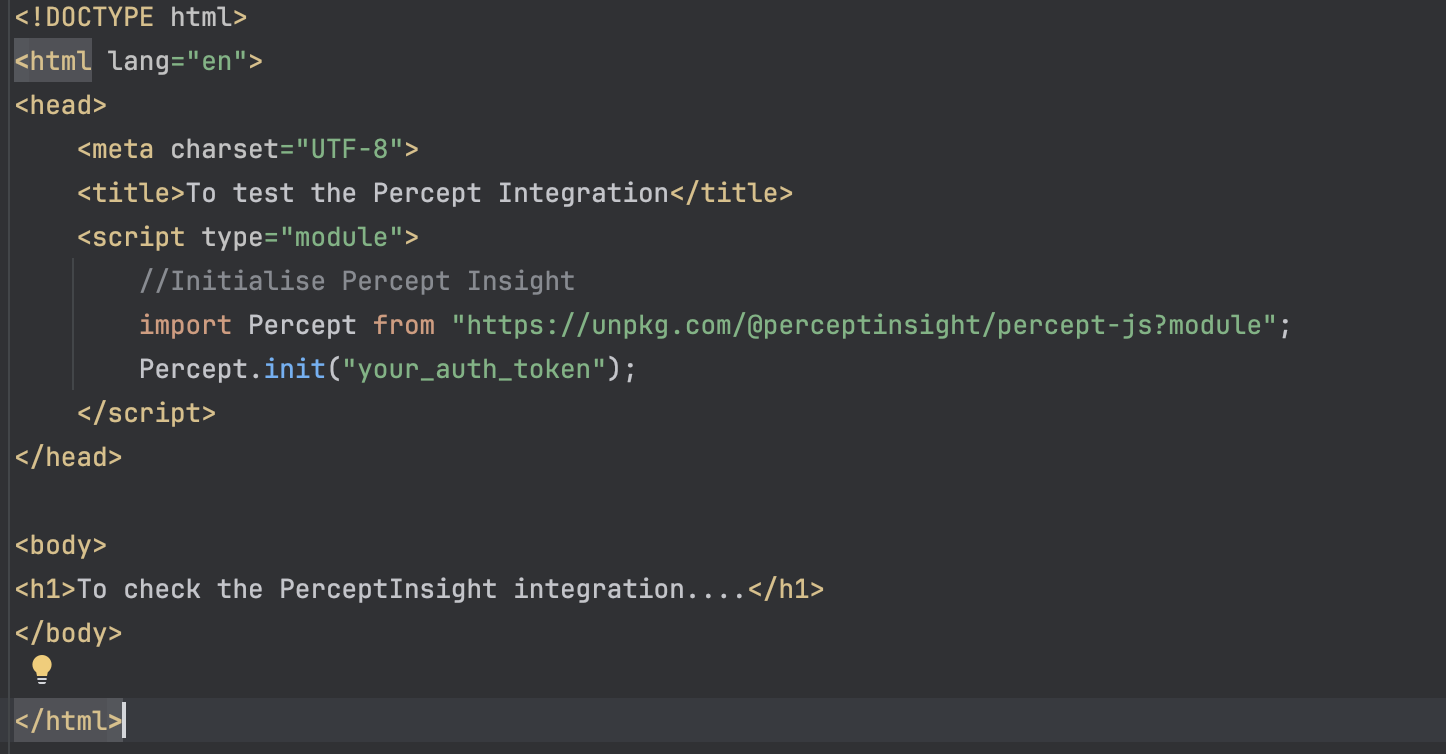
Sample code
<!doctype html>
<html lang="en">
  <head>
    <meta charset="UTF-8" />
    <title>To test the Percept Integration</title>
    <script type="module">
      //Initialise Percept Insight
      import Percept from "https://unpkg.com/@perceptinsight/percept-js?module";
      Percept.init("your_auth_token");
    </script>
  </head>
  <body>
    <h1>To check the PerceptInsight integration....</h1>
  </body>
</html>
Make sure you are replacing your_auth_token with the token that would have been provided when you logged in.

Save the above file as test.html
Step 4
Open test.html on any HTML browser of your choice.

Step 5
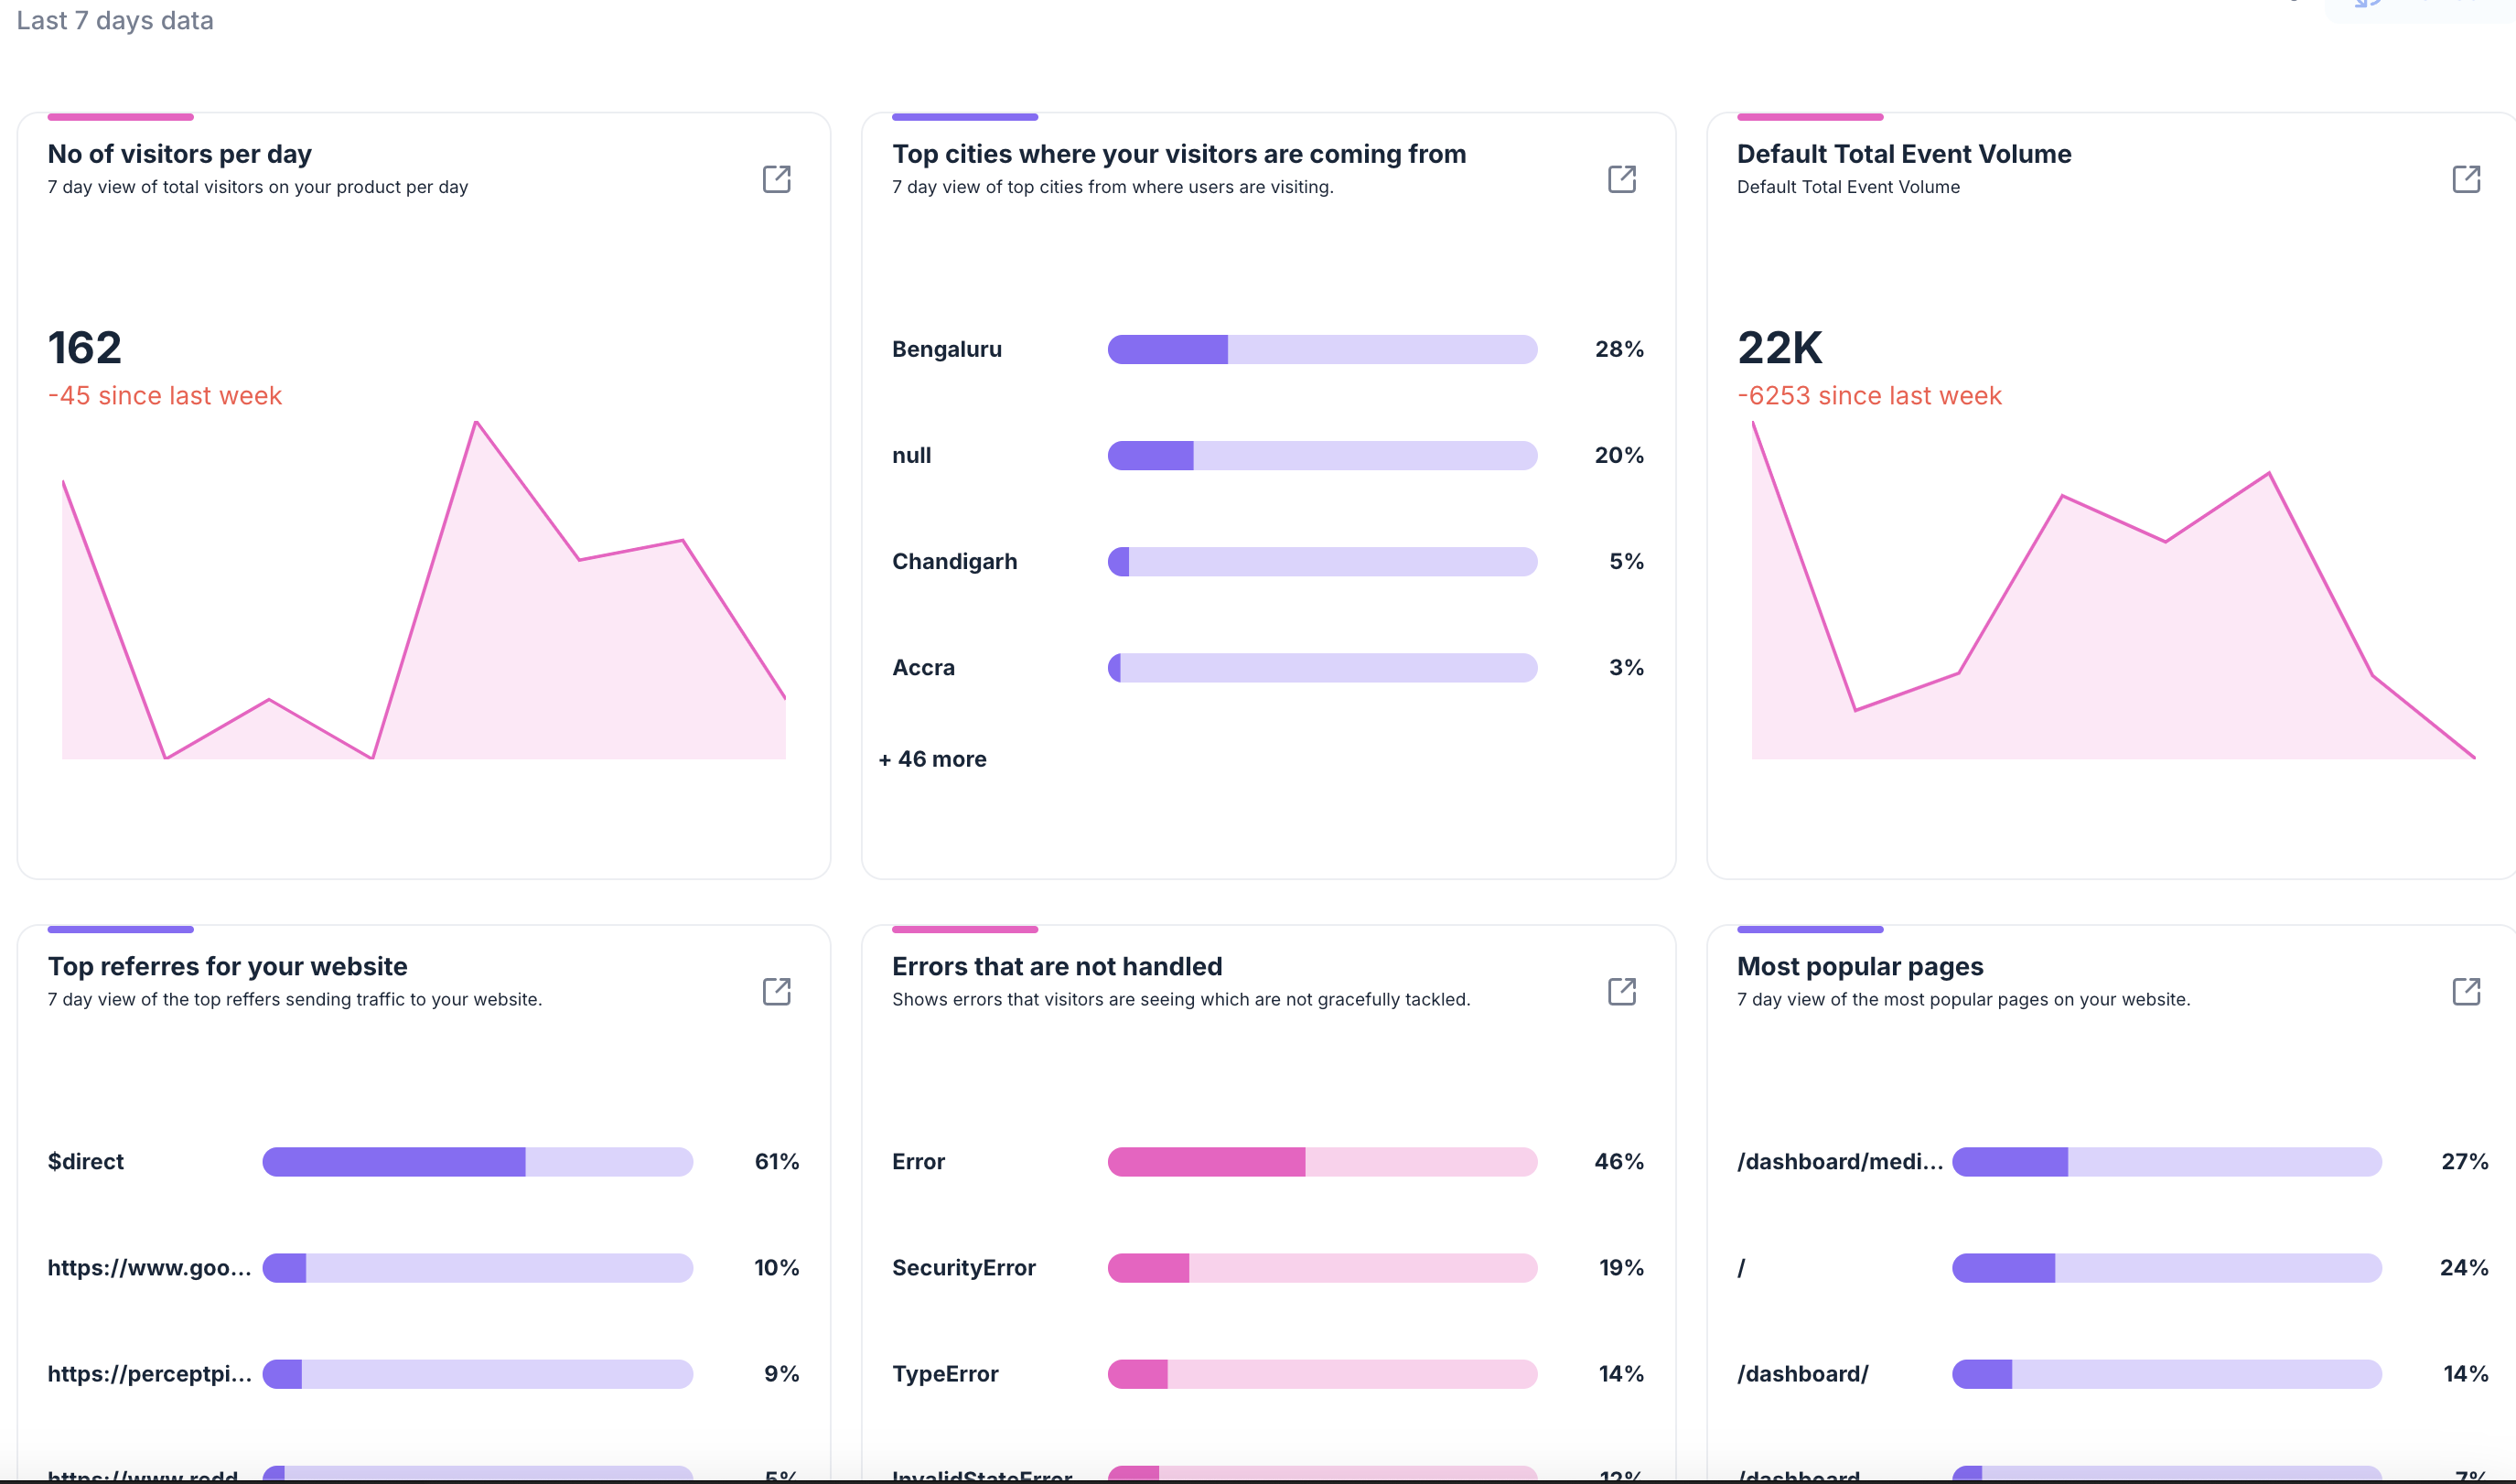
Once done check on PerceptInsight if your integration has been successful. The PerceptInsight console will show something like what you see below.

Step 6
Once integrated if you click Get Started you will notice Insights Hub starting to show these reports.
Setting up Events and Properties
Events are properties are useful to understand the frequency of interactions on your real estate, and useful for creating detailed reports like insights, funnels, flows etc.
Example of how to setup a property on wordpress
Step 1
Copy this code
<!doctype html>
<html lang="en">
  <head>
    <meta charset="UTF-8" />
    <title>Title</title>
    <h1>Demo to showcase how PerceptInsight integration is done</h1>
    <script type="module">
      //Initialise Percept Insight
      import Percept from "https://unpkg.com/@perceptinsight/percept-js?module";
      Percept.init("your-auth-token");
      Percept.capture("Screen View", { screenName: "TestPage" });
    </script>
  </head>
  <body></body>
</html>
Remember to change the name of screen depending upon the screen from which you are launching. In this case we have it hard coded as TestPage.
Remember to ensure that you are replacing with your auth token
Step 2
Now save the file as test.html
Step 3
Check if the screen name is getting setup
Go to the Events dashboard
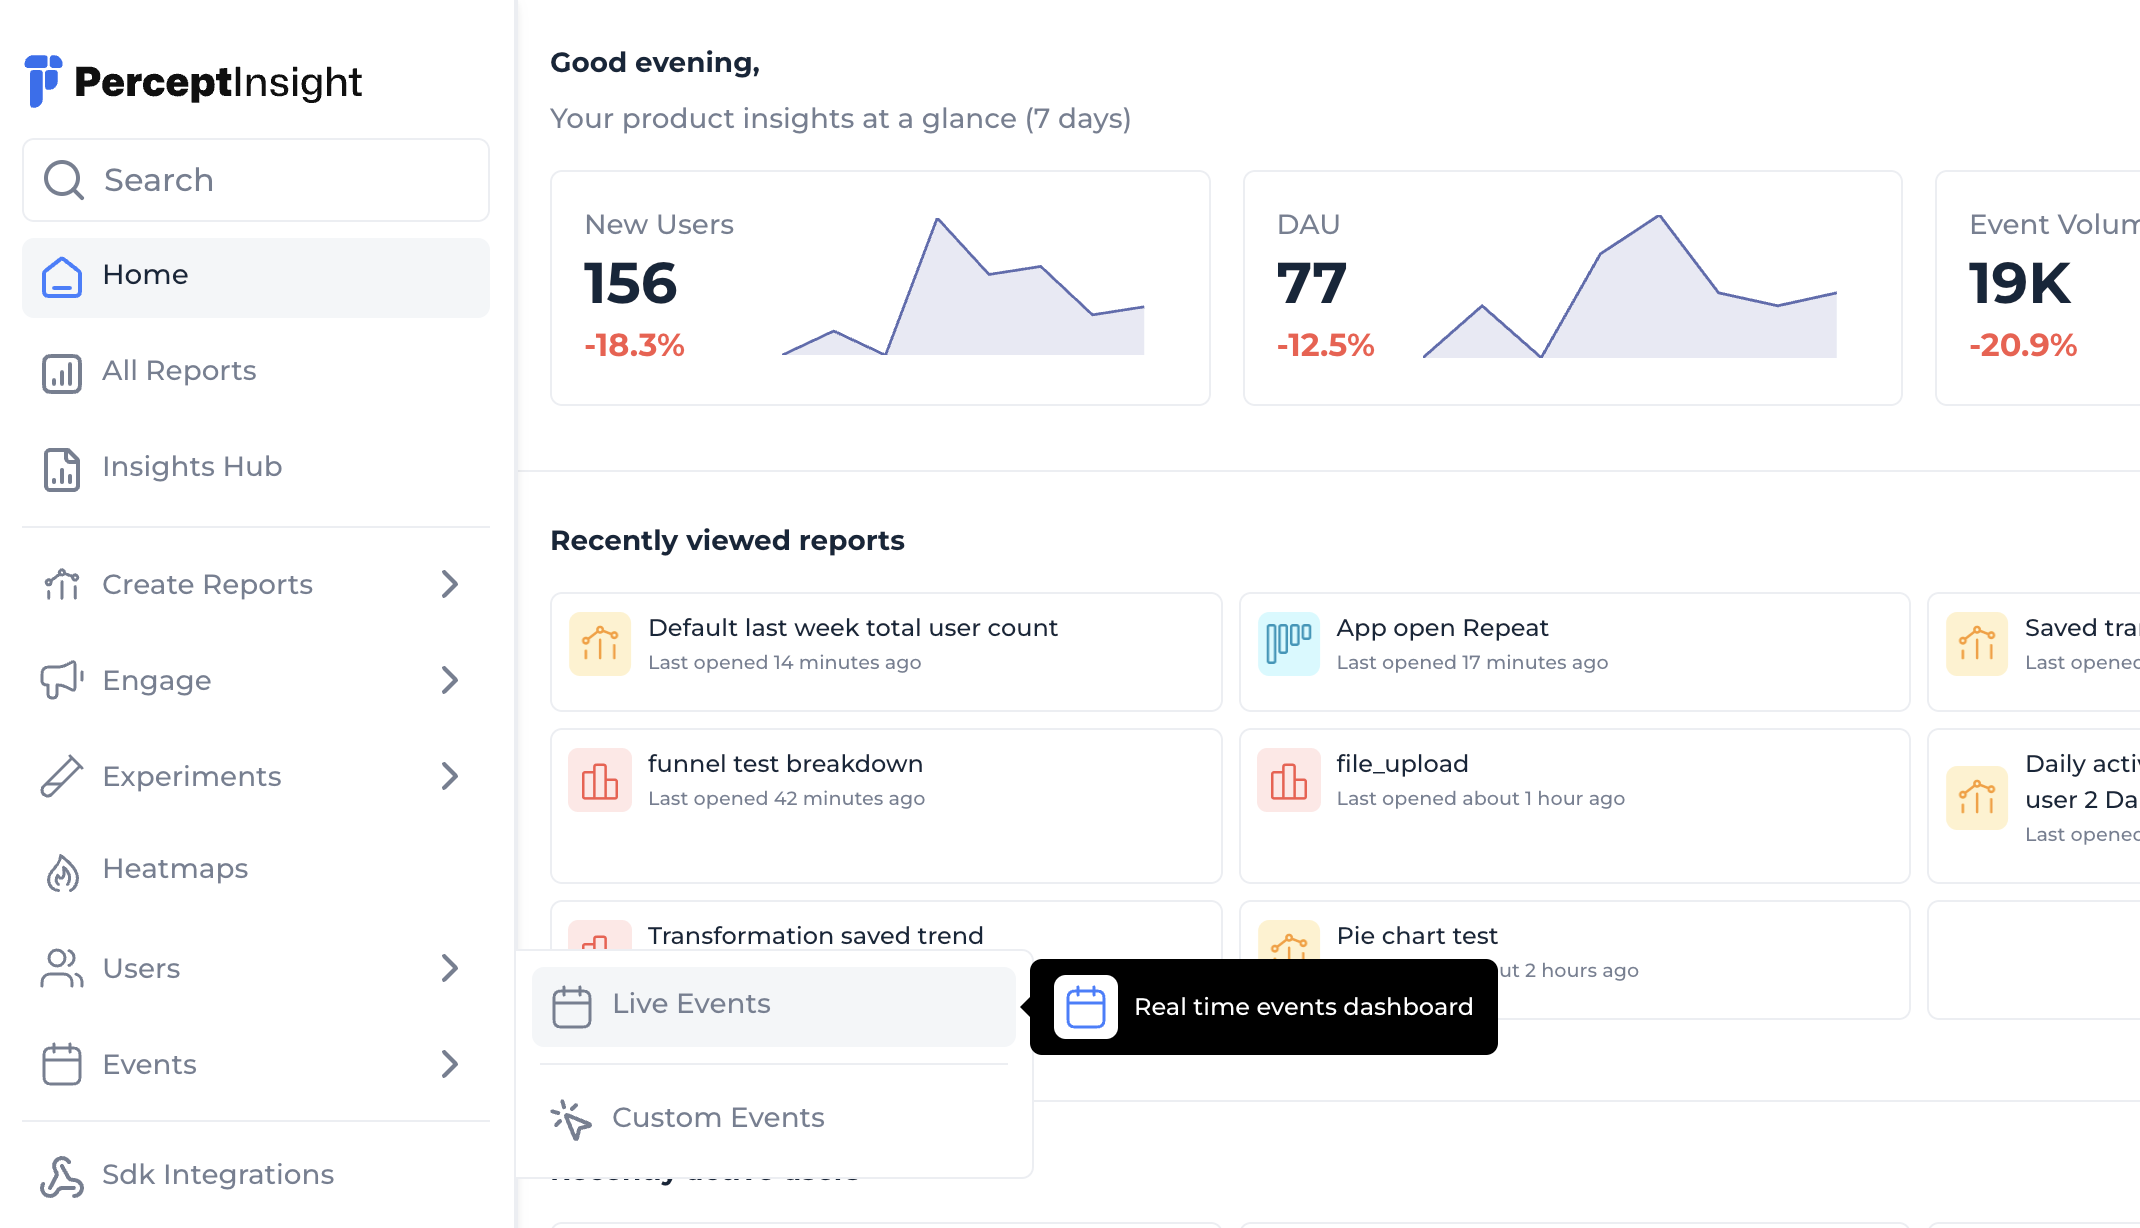
There find the Screen View event

Expand it to find your Screen View details
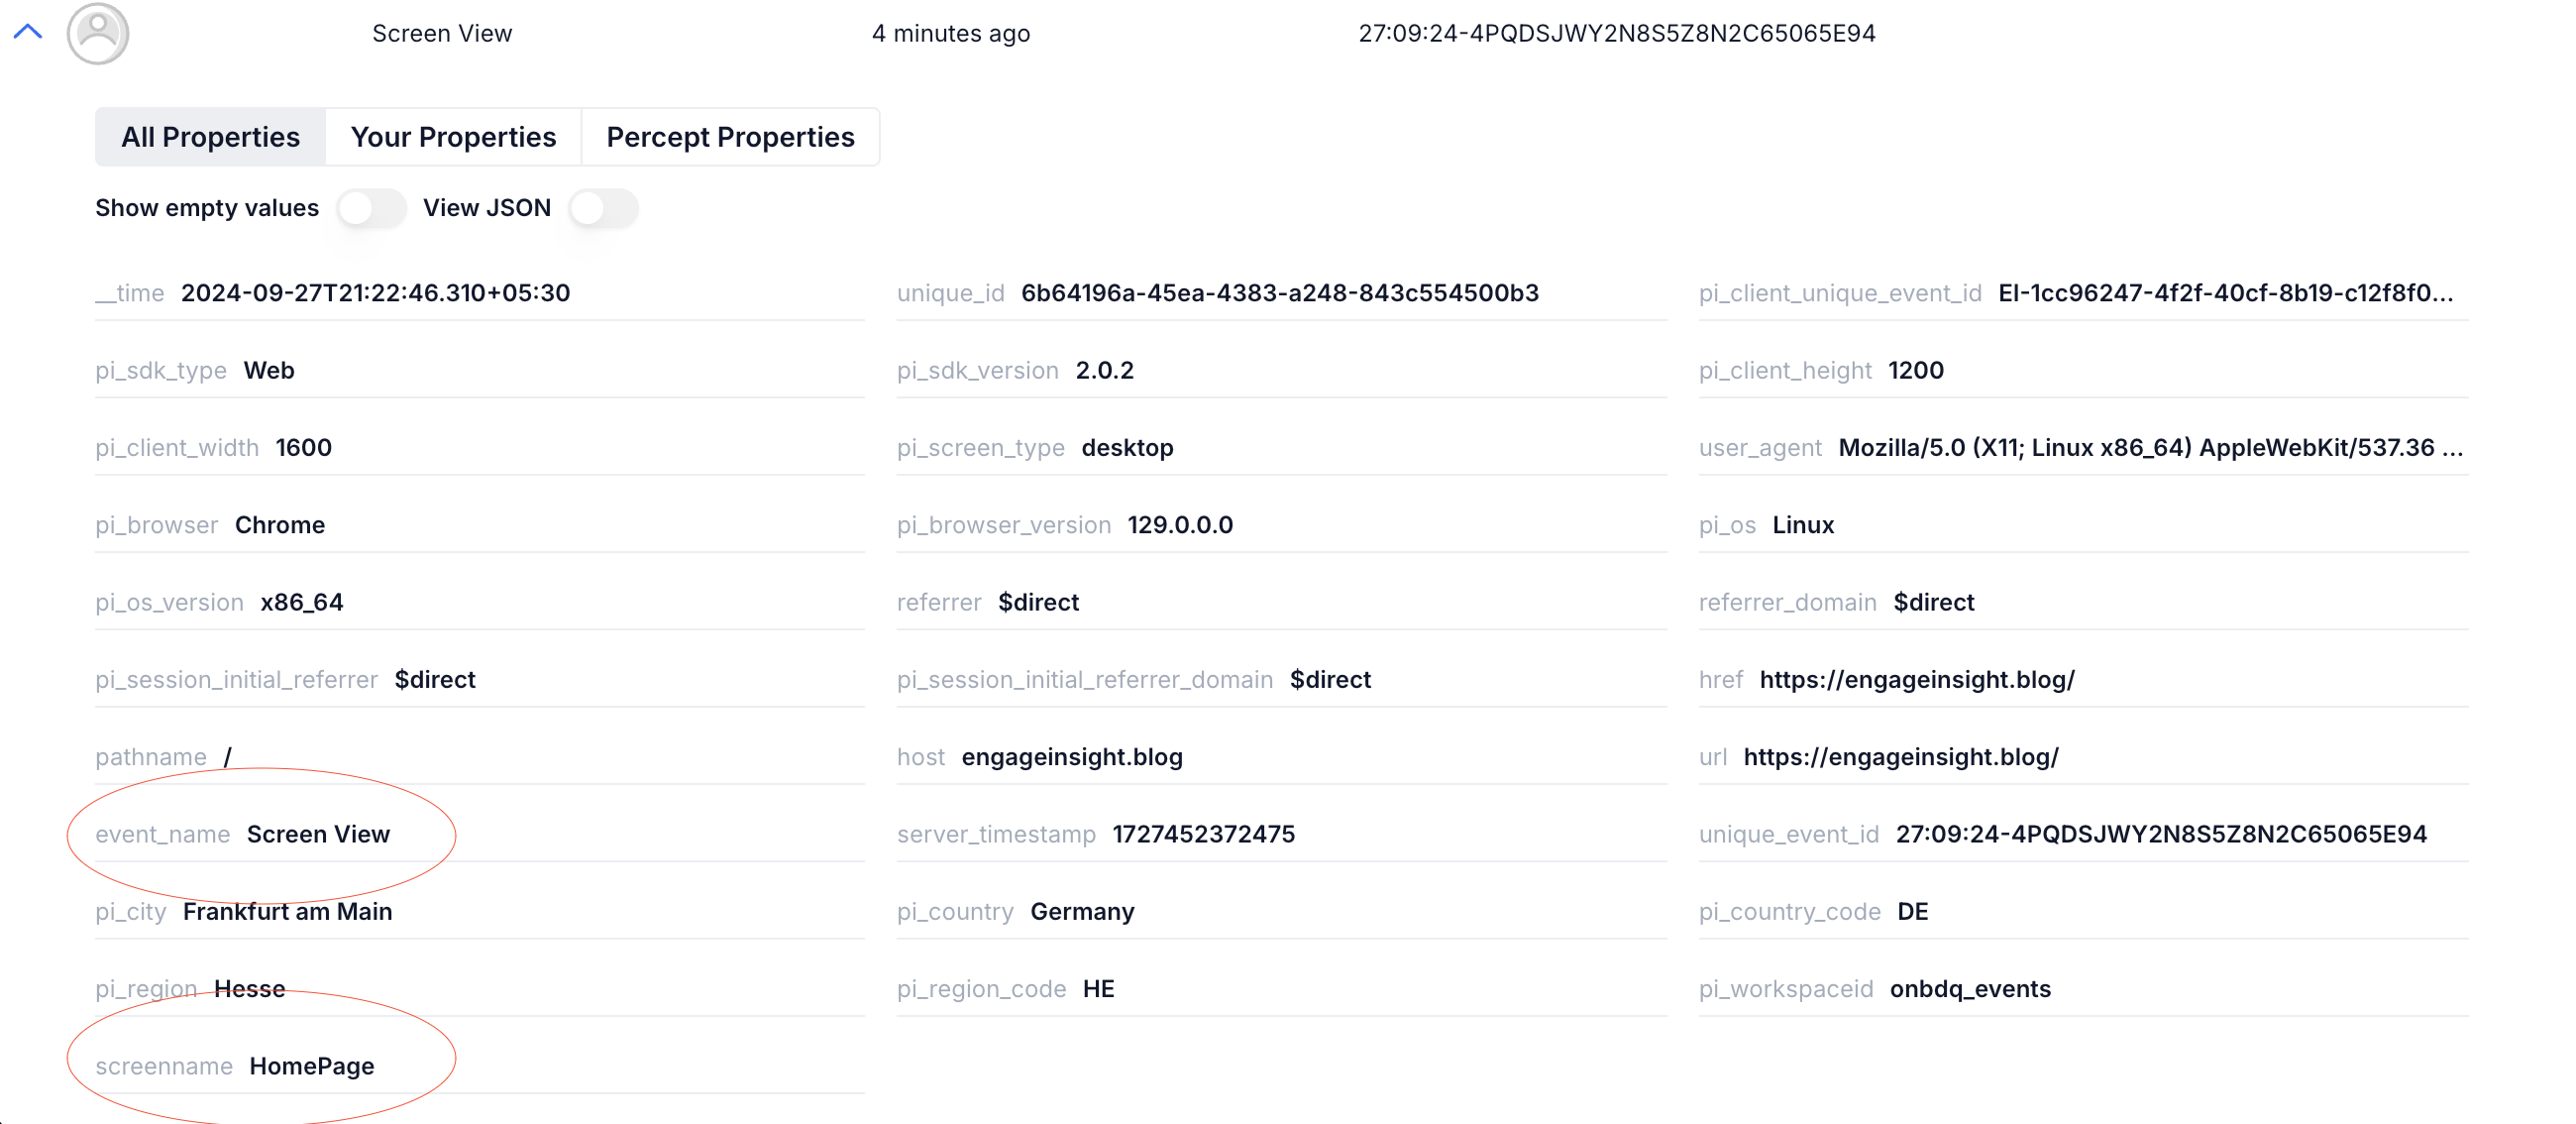
If you see the details you have successfully started capturing screen views 🙂
Setting up UserId and Button Clicks
User ids are extremely important to understand funnels, create cohorts, segment users and figure out their user behaviours. With PerceptInsight you can easily setup user id with a simple integration.
The code below demonstrates how to setup both user_ids and button click events.
Step 1
Copy the sample code below
<!doctype html>
<html lang="en">
  <head>
    <meta charset="UTF-8" />
    <title>Title</title>
    <h1>Demo to showcase how PerceptInsight integration is done</h1>
    <script type="module">
      //Initialise Percept Insight
      import Percept from "<https://unpkg.com/@perceptinsight/percept-js?module>";
      Percept.init("your-auth-token");
      //Setting user id
      Percept.setUserId("tech-avsdygsixa");
      // Track event-name with property
      Percept.capture("Screen View", { screenName: "TestPage" });
      // capture button click
      document
        .getElementById("trackButton")
        .addEventListener("click", function () {
          // Capture button click event
          Percept.capture("Button Click", {
            screenName: "TestPage",
            buttonName: "Track Event",
          });
        });
    </script>
  </head>
  <body>
    <b> will demo how to setup button tracking below </b> <br />
    <button id="trackButton">Track Event</button>
  </body>
</html>
Remember to change the name of screen depending upon the screen from which you are launching. In this case we have it hard coded as TestPage.
Remember to ensure that you are replacing with your auth token
Remember that the user_id has been hardcoded as tech-avsdygsixa. You need to make sure that you are dynamically passing this ID basis who the user is.
Step 2
Now save the file as test.html. Then open the file on your browser.
Step 3
Check if the the user id is being set now as well as if the button click event is appearing.
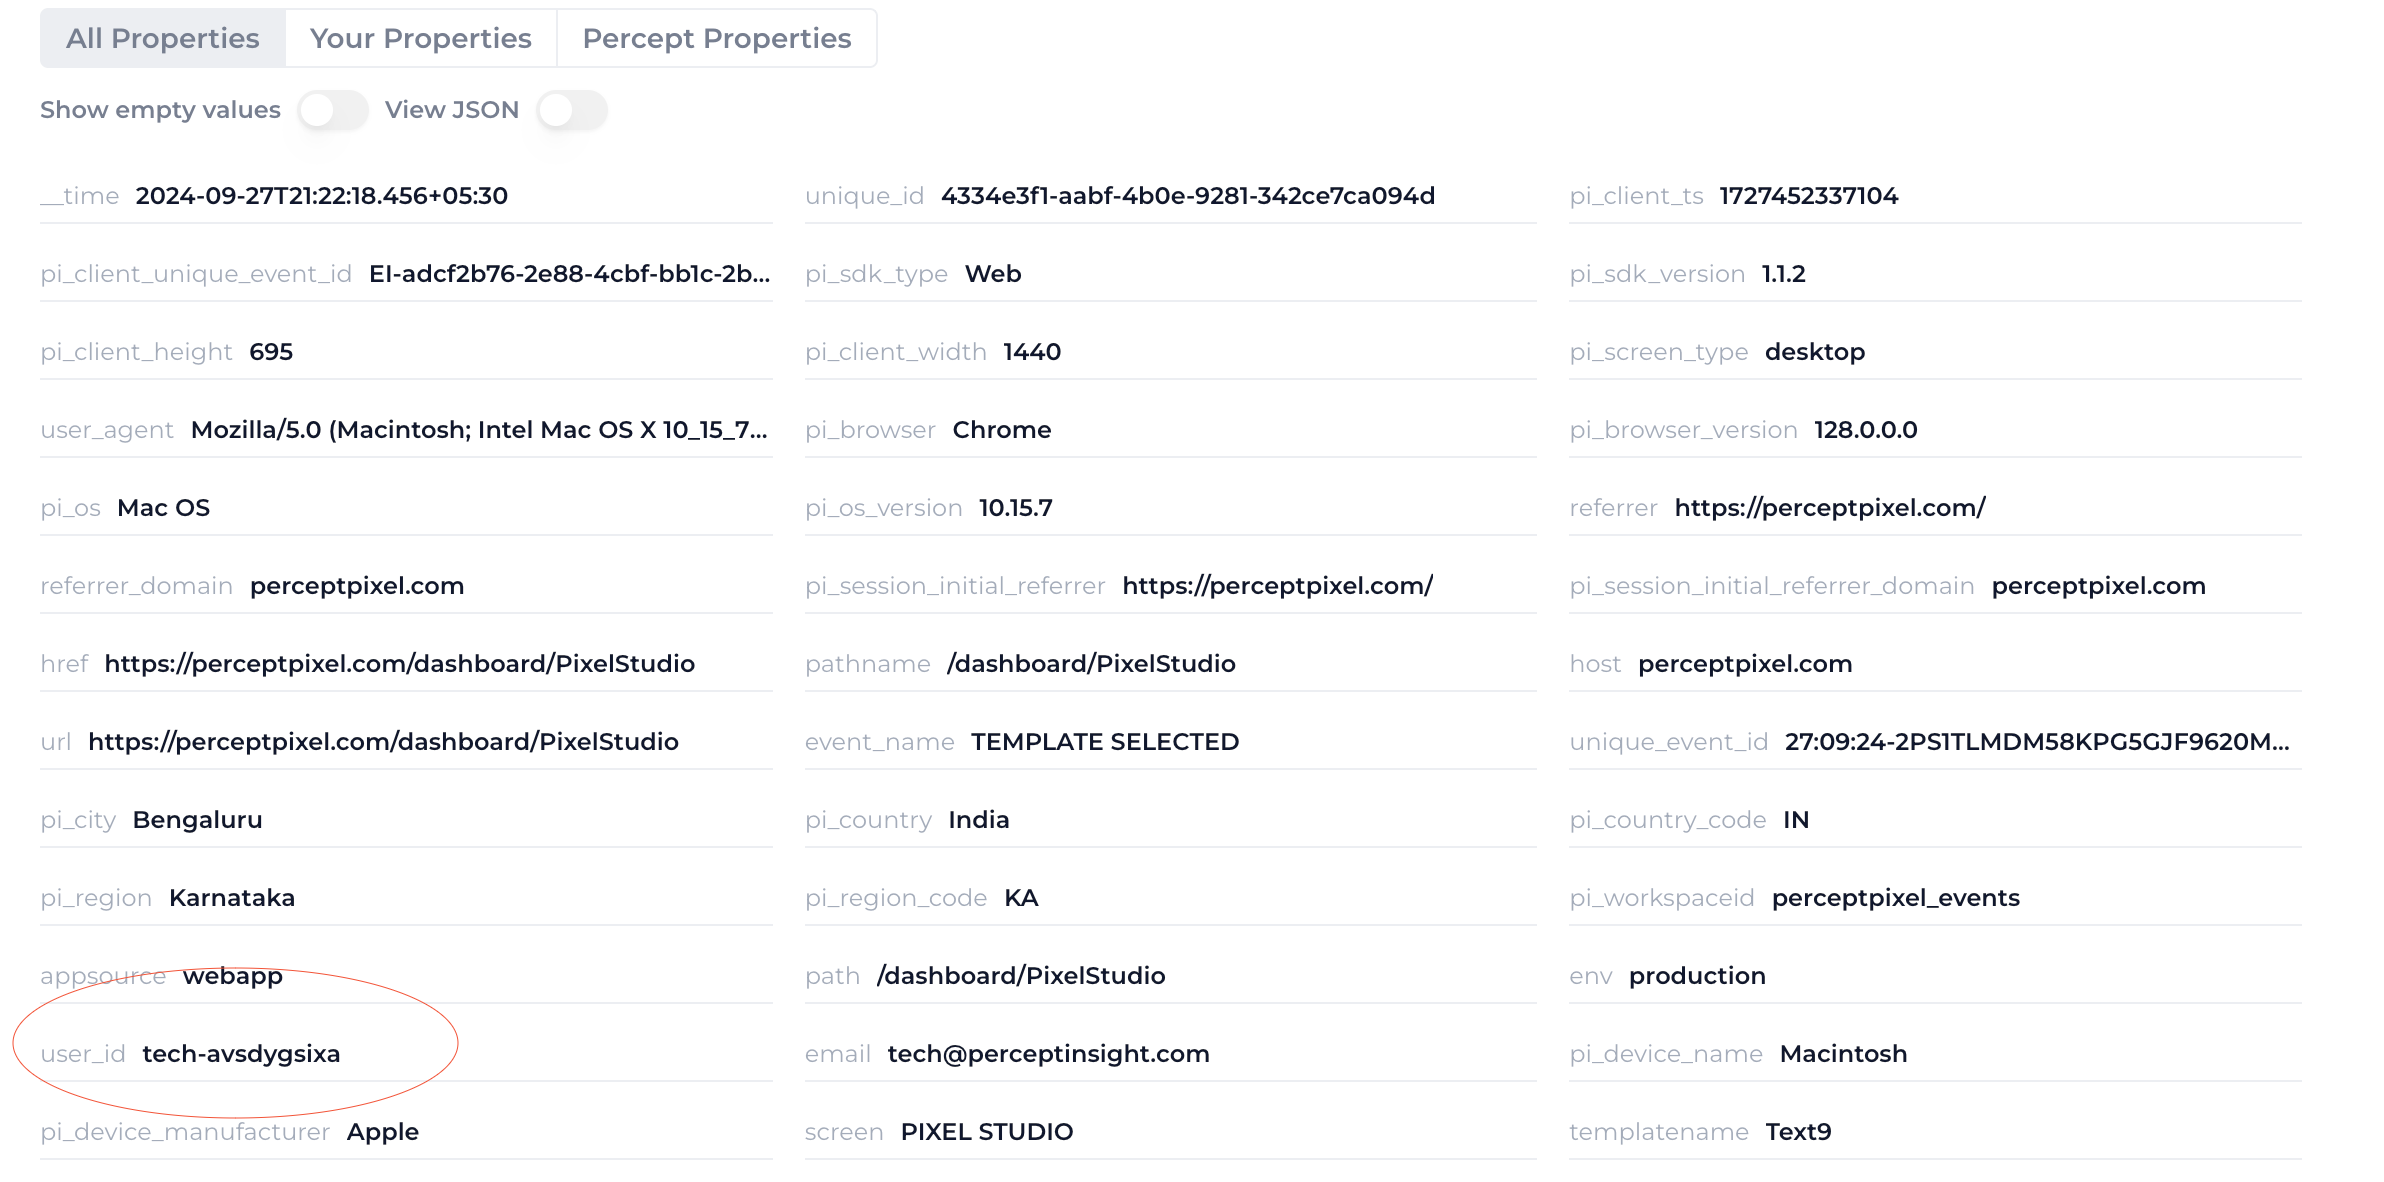
Similarly see if the Button click event is appearing. It should appear with the event name as Button Click