Wordpress
Percept SDK usage with Wordpress
Initialisation
Step 1
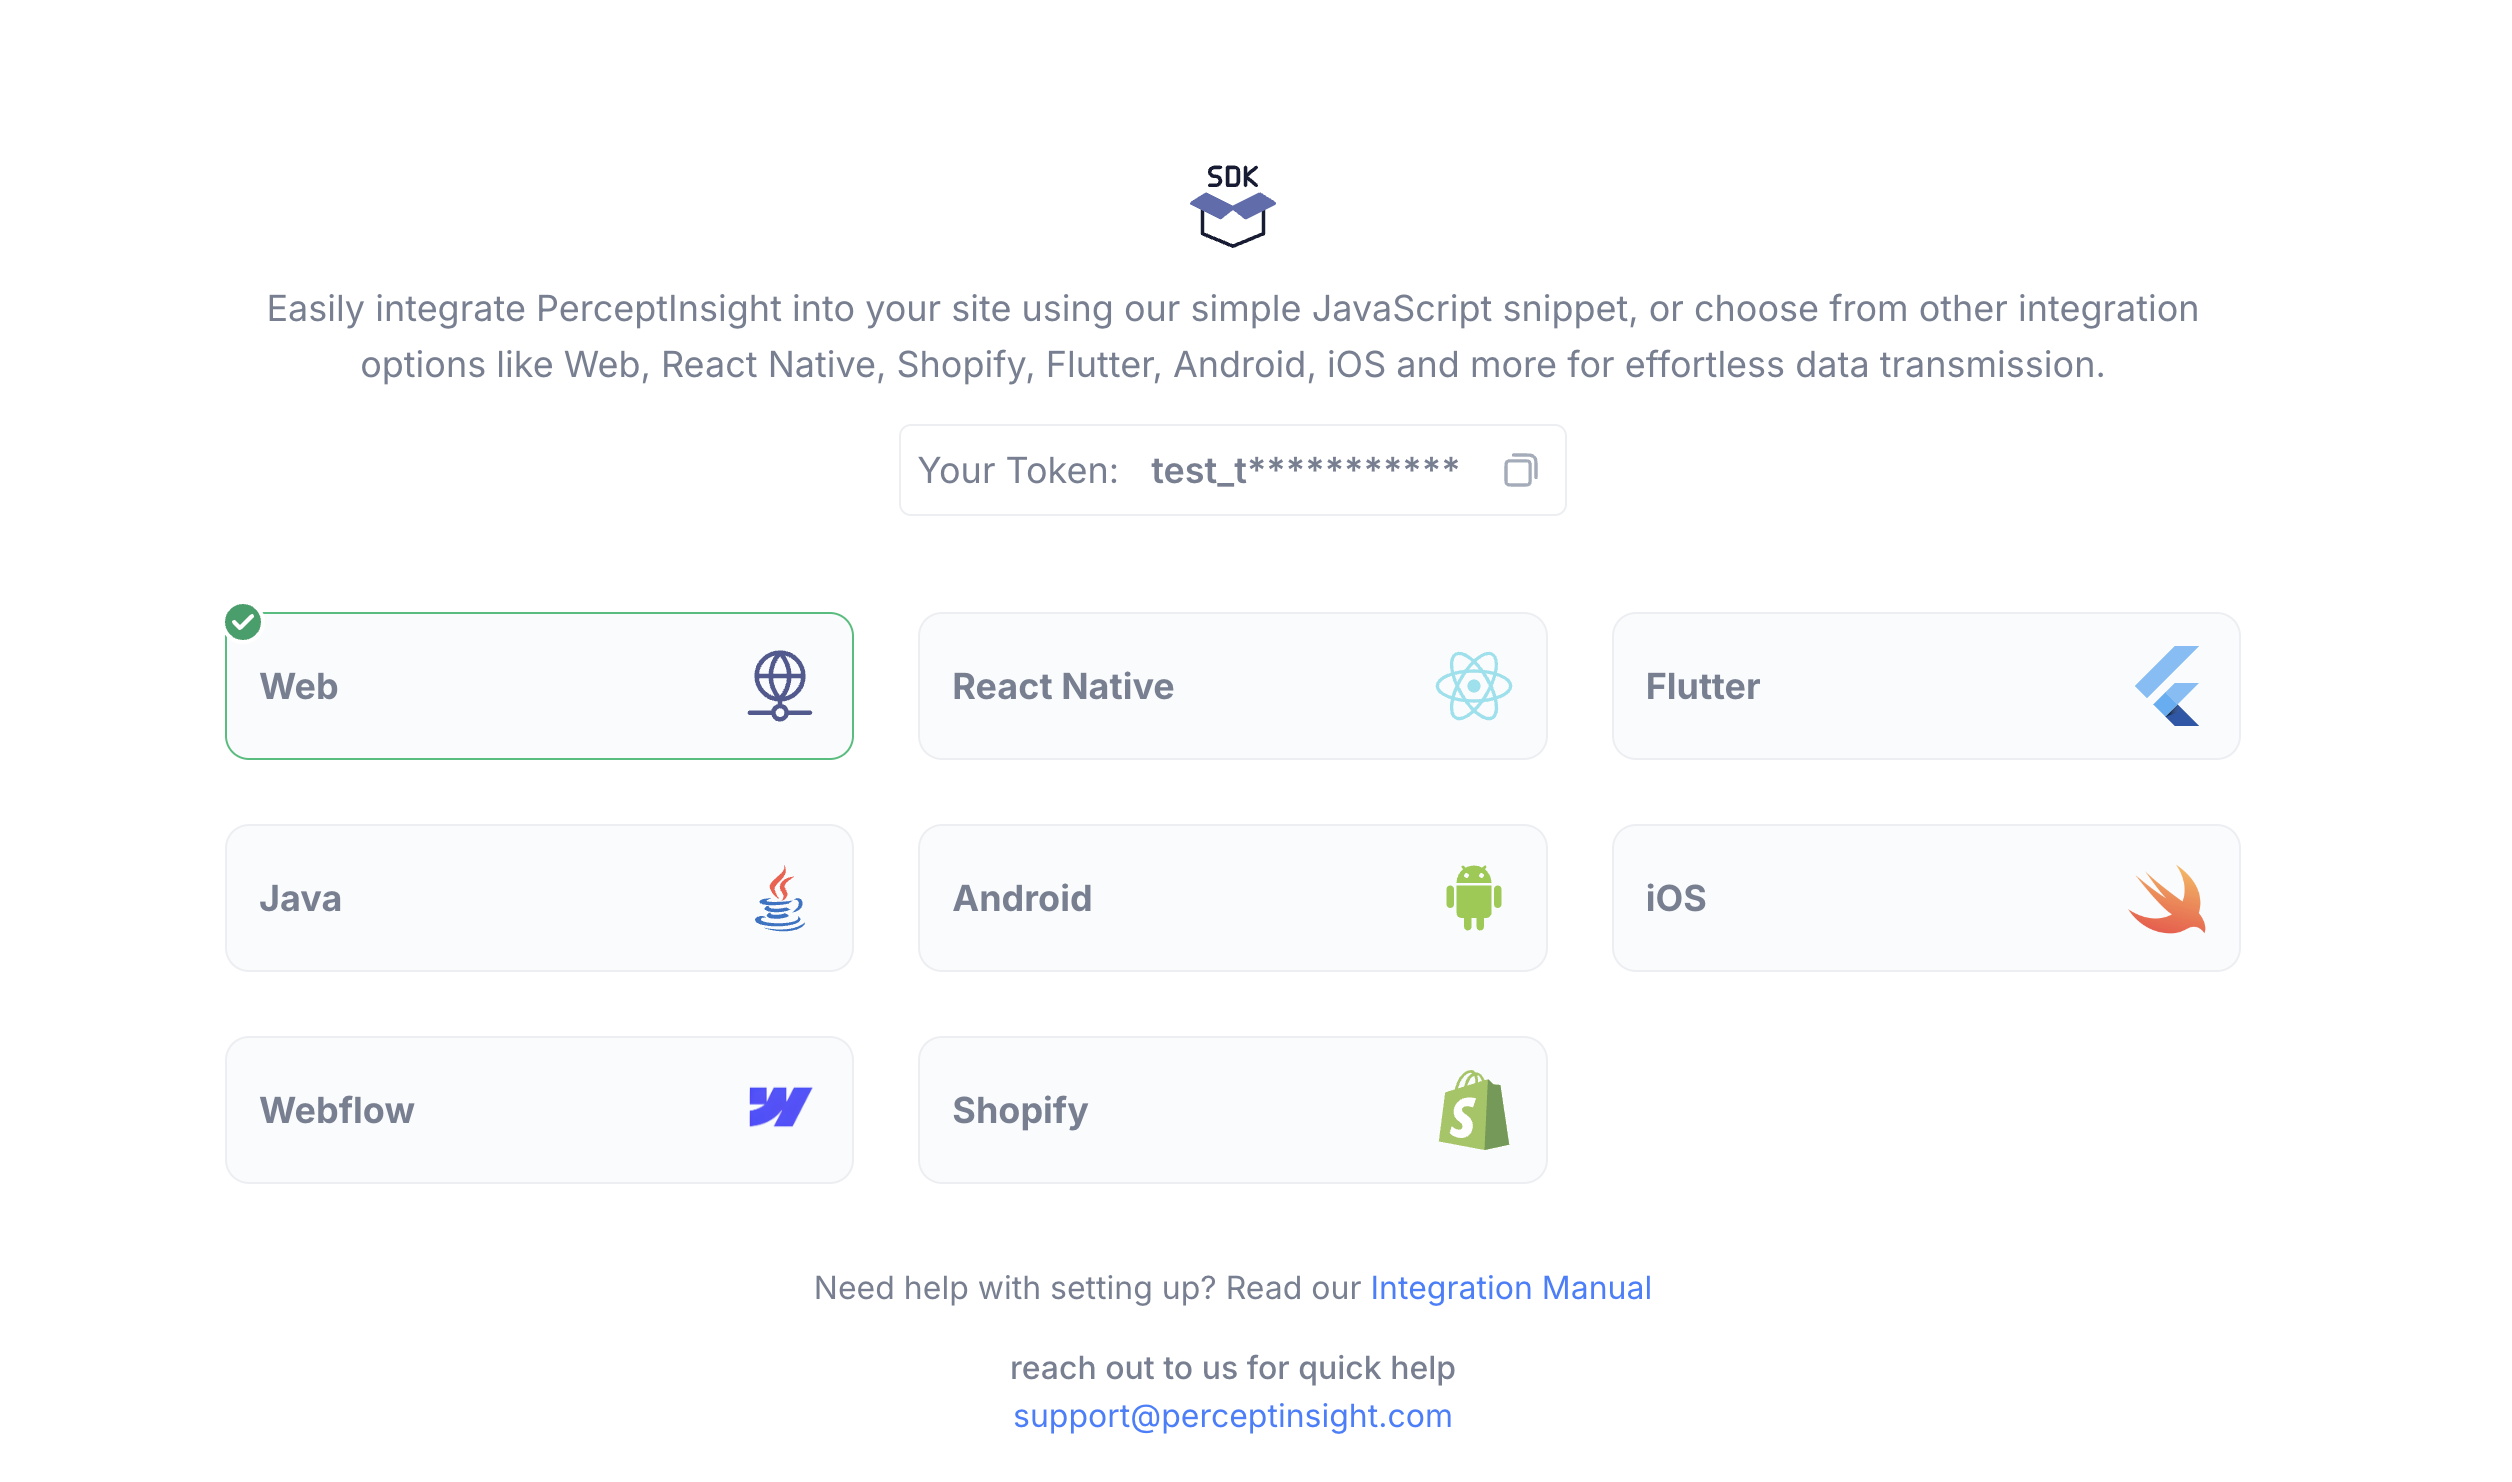
Once you log in, please choose the client technology with which your website/app is built. For our demonstration purposes, we are choosing a Web SDK.
Step 2
Simply copy the code as instructed on the page. Make sure that you are using your auth token that would have been provided as part of your code and not the illustration auth token.
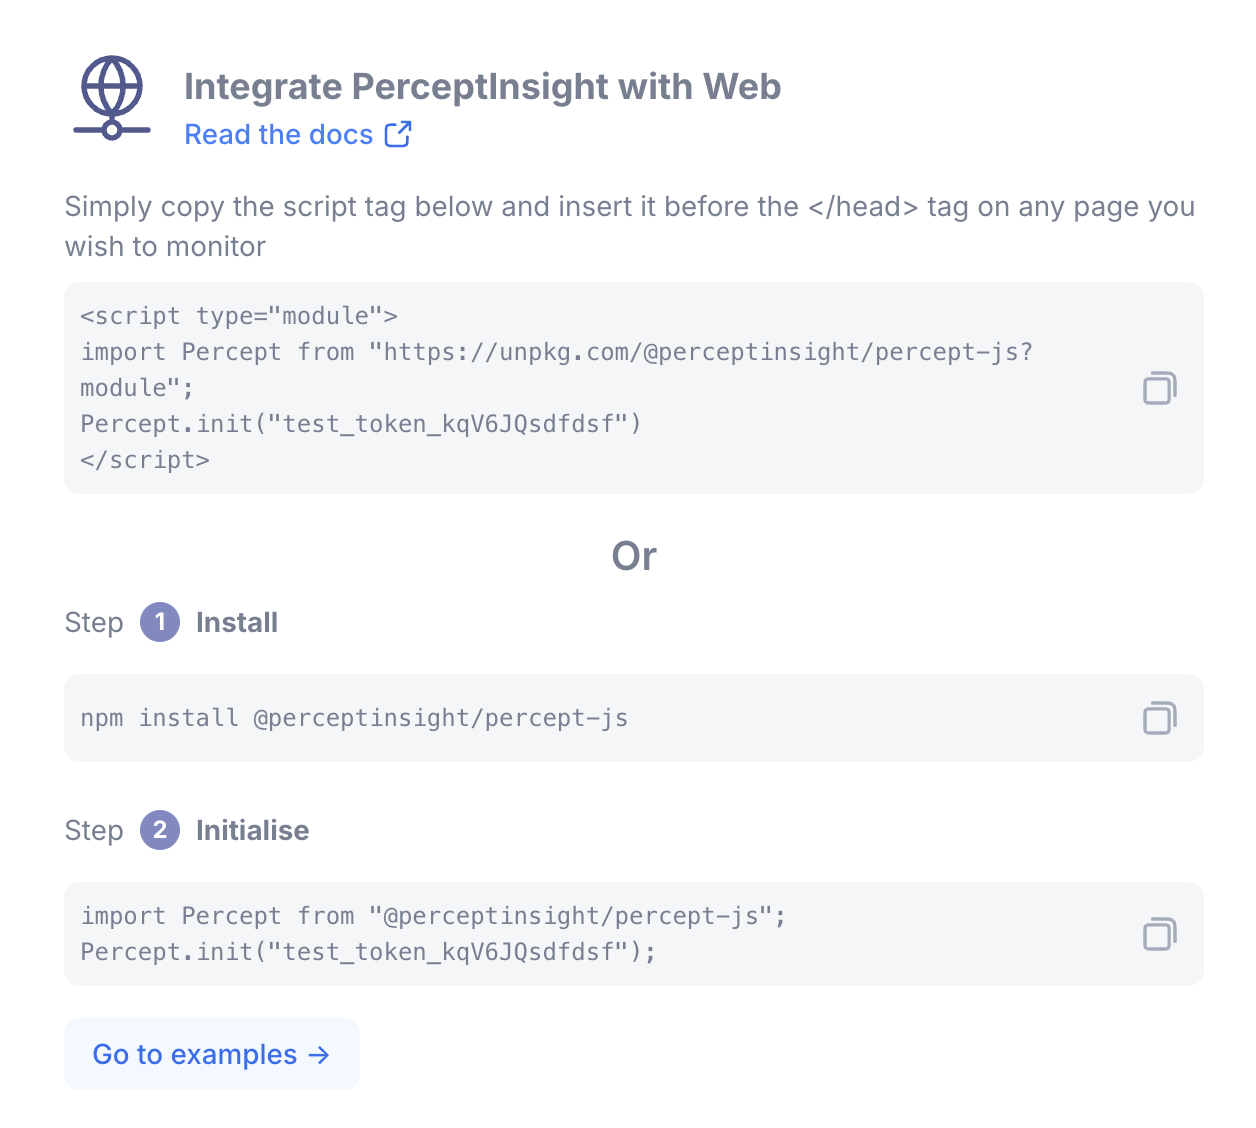
The code will look like this once you copy it (make sure that the auth_token is the one provided when you logged in).

<script type="module">
  import Percept from "https://unpkg.com/@perceptinsight/percept-js?module";
  Percept.init("your_auth_token");
</script>
Step 3
Next, open the code snippet in the WordPress admin panel and select Header & Footer. Place the following code:
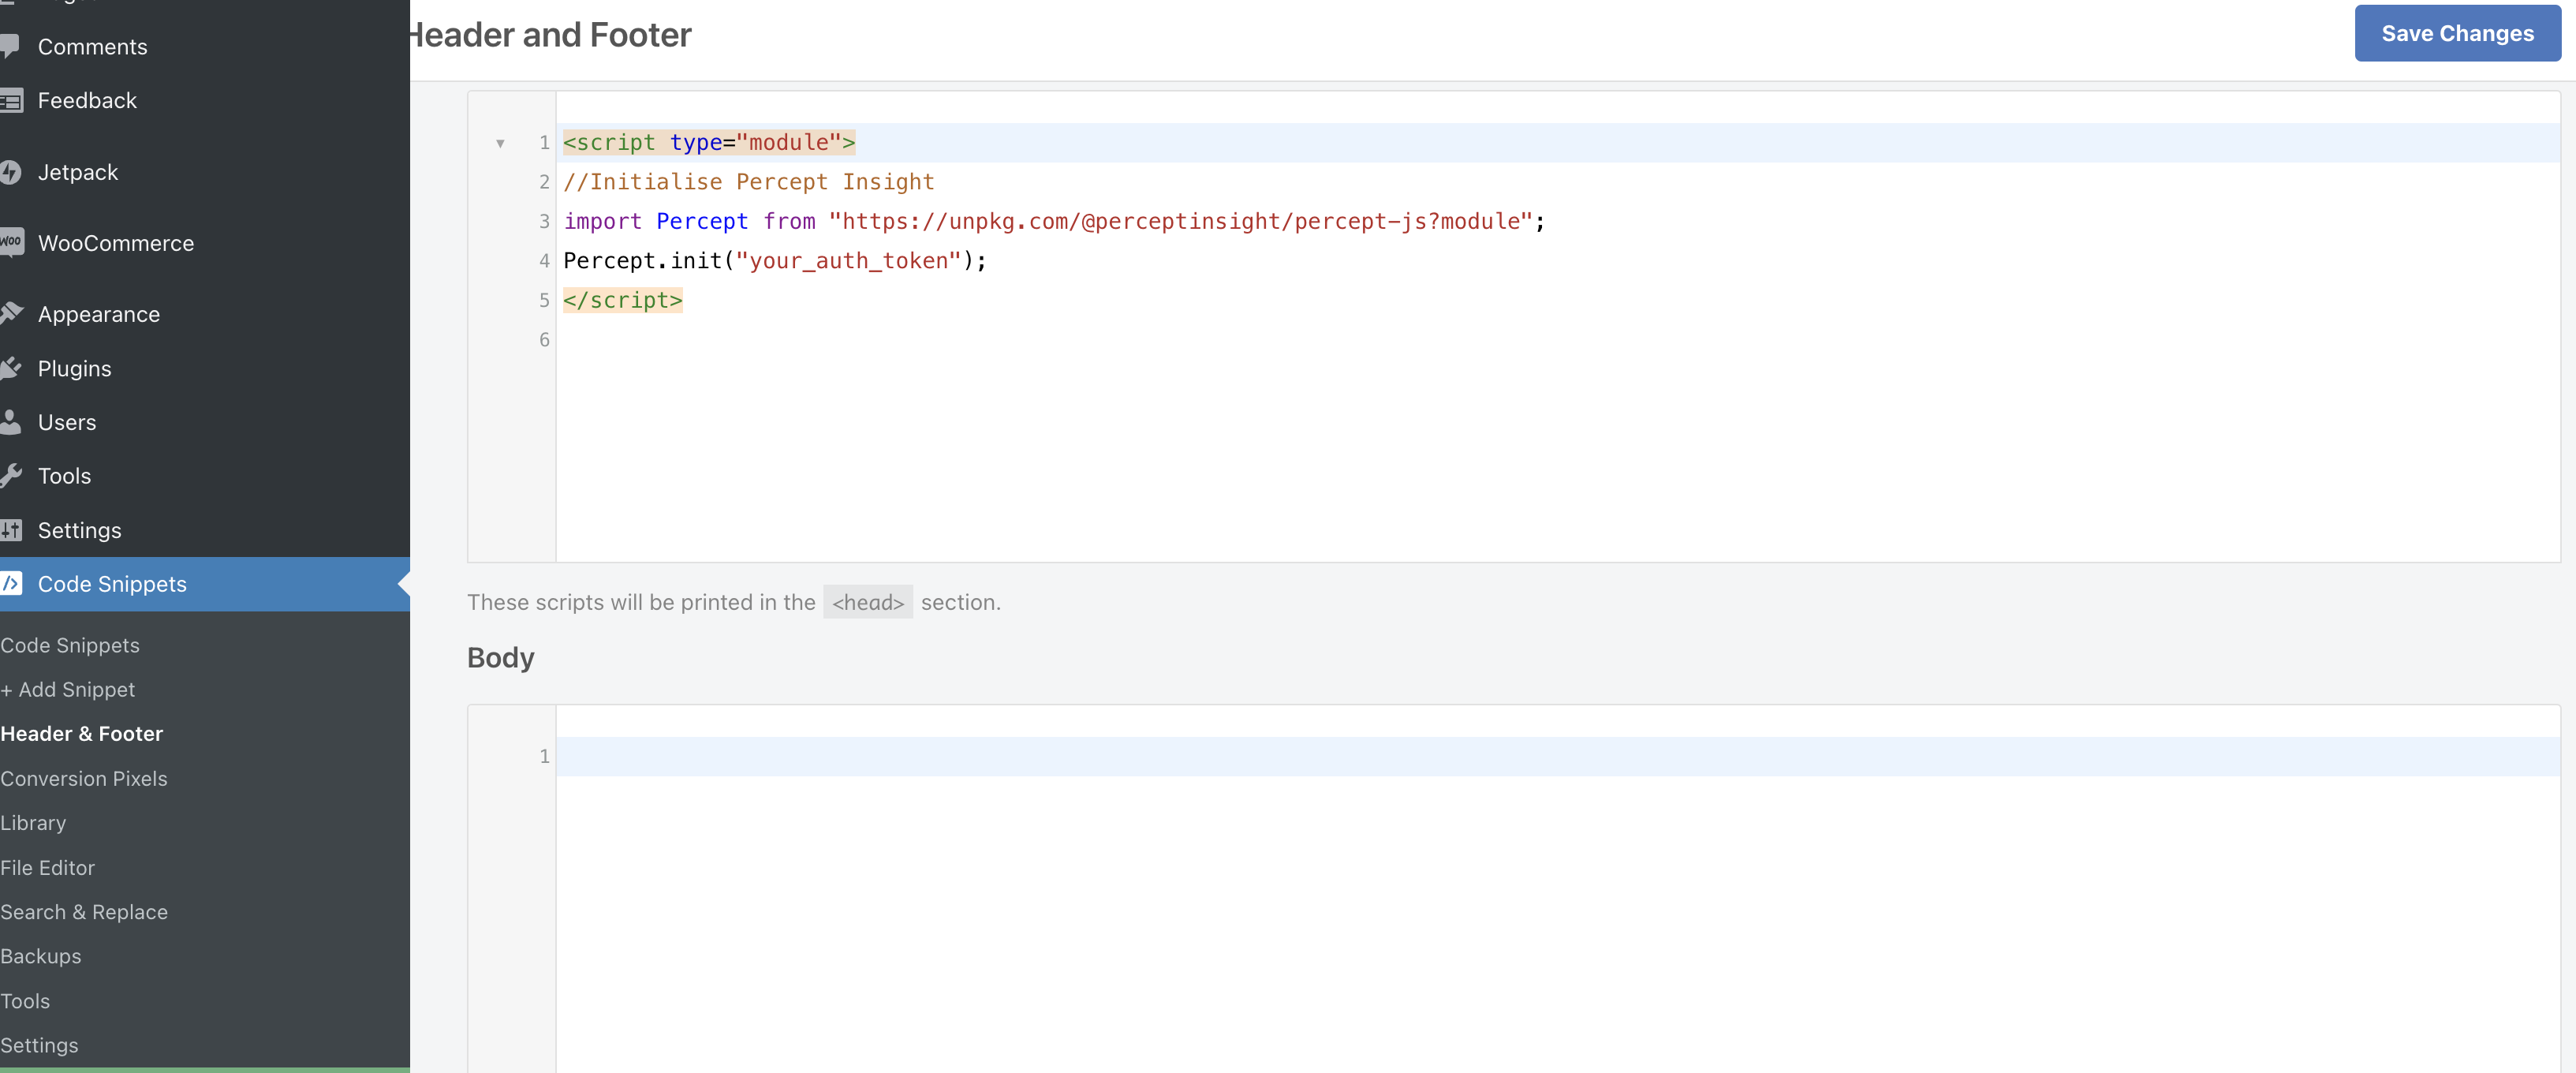
Sample code:
<script type="module">
  //Initialise Percept Insight
  import Percept from "https://unpkg.com/@perceptinsight/percept-js?module";
  Percept.init("your_auth_token");
</script>
Make sure you replace your_auth_token with the token provided when you logged in.

Click on the Save Changes button.
Step 4
Publish your WordPress blog in a browser.
Step 5
Once done, check on PerceptInsight if your integration has been successful. The PerceptInsight console will show something like this:

Step 6
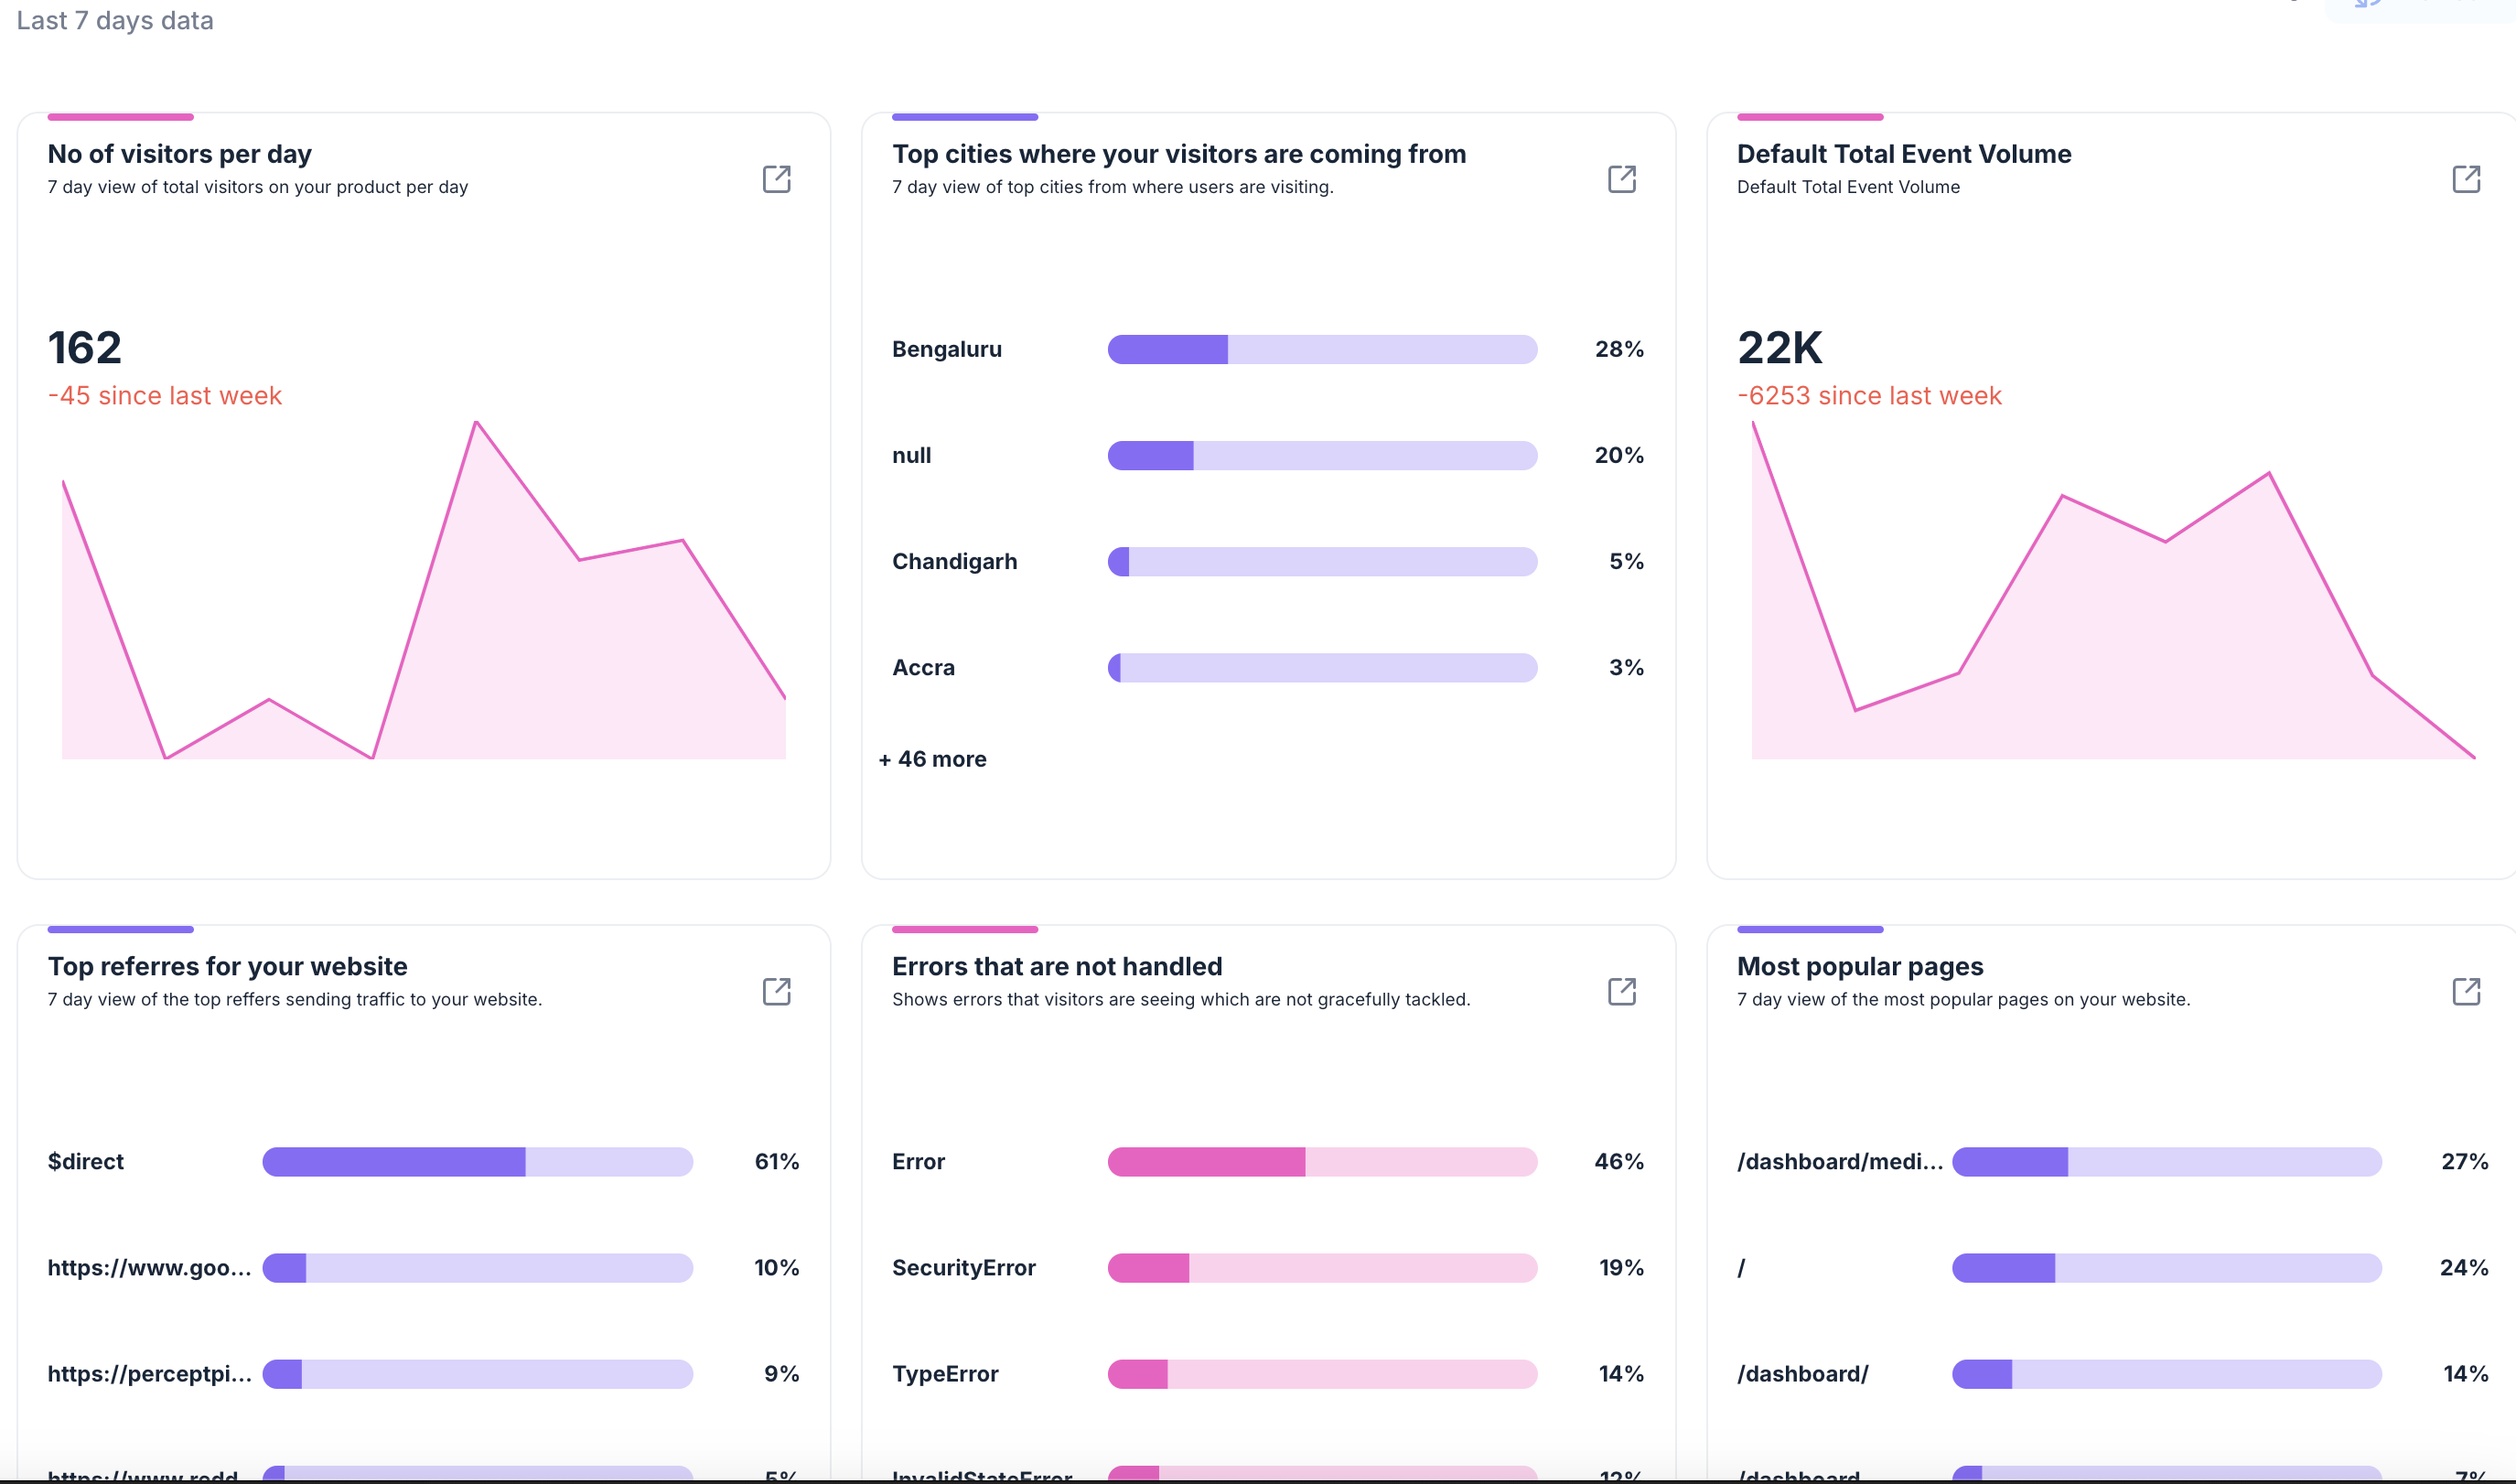
Once integrated, if you click Get Started, you will notice the Insights Hub starting to show these reports.
Initialising and Setting Events and Properties
Events and Properties
Events and properties are useful to understand the frequency of interactions on your platform and are helpful in creating detailed reports like insights, funnels, flows, etc.
Step 1
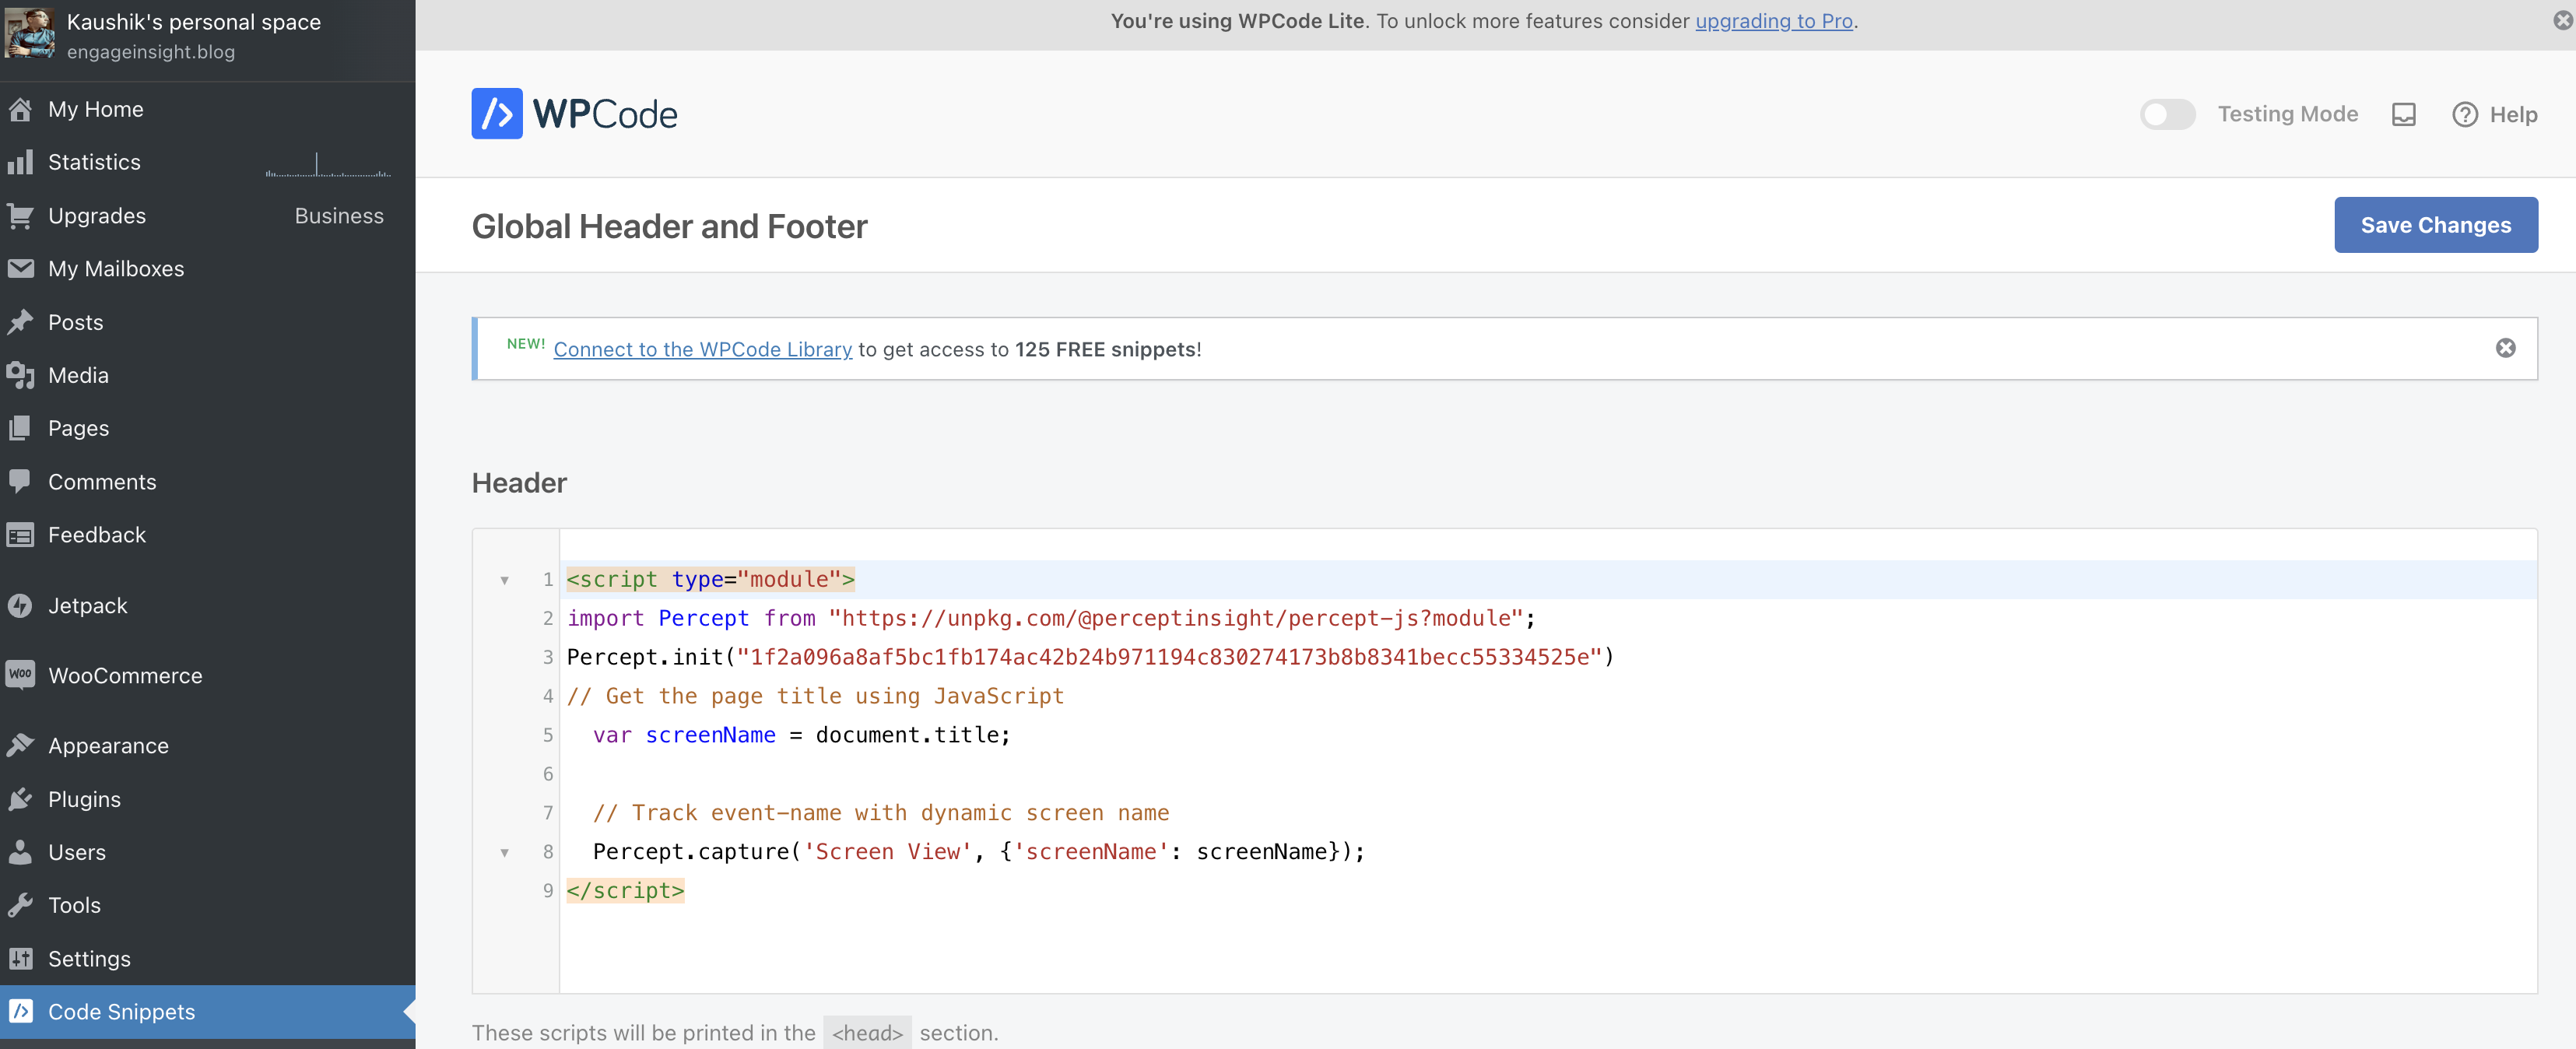
Copy this code:
<script type="module">
 //Initialise Percept Insight
 import Percept from "https://unpkg.com/@perceptinsight/percept-js?module";
 Percept.init("your-auth-token");    //Setting user id
 // Get the page title using JavaScript
  var screenName = document.title;

  // Track event-name with dynamic screen name
  Percept.capture('Screen View', {'screenName': screenName});
</script>
Remember to change the name of the screen depending on the screen from which you are launching. In this case, it is hardcoded as HomePage.
Make sure to replace your_auth_token with your actual auth token.
Put this code in CodeSnippet > Header section of your WordPress site, like this, and click Save Changes:
Step 2
Publish your WordPress blog.
Step 3
Check if the screen name is being set up by going to the Events Dashboard.
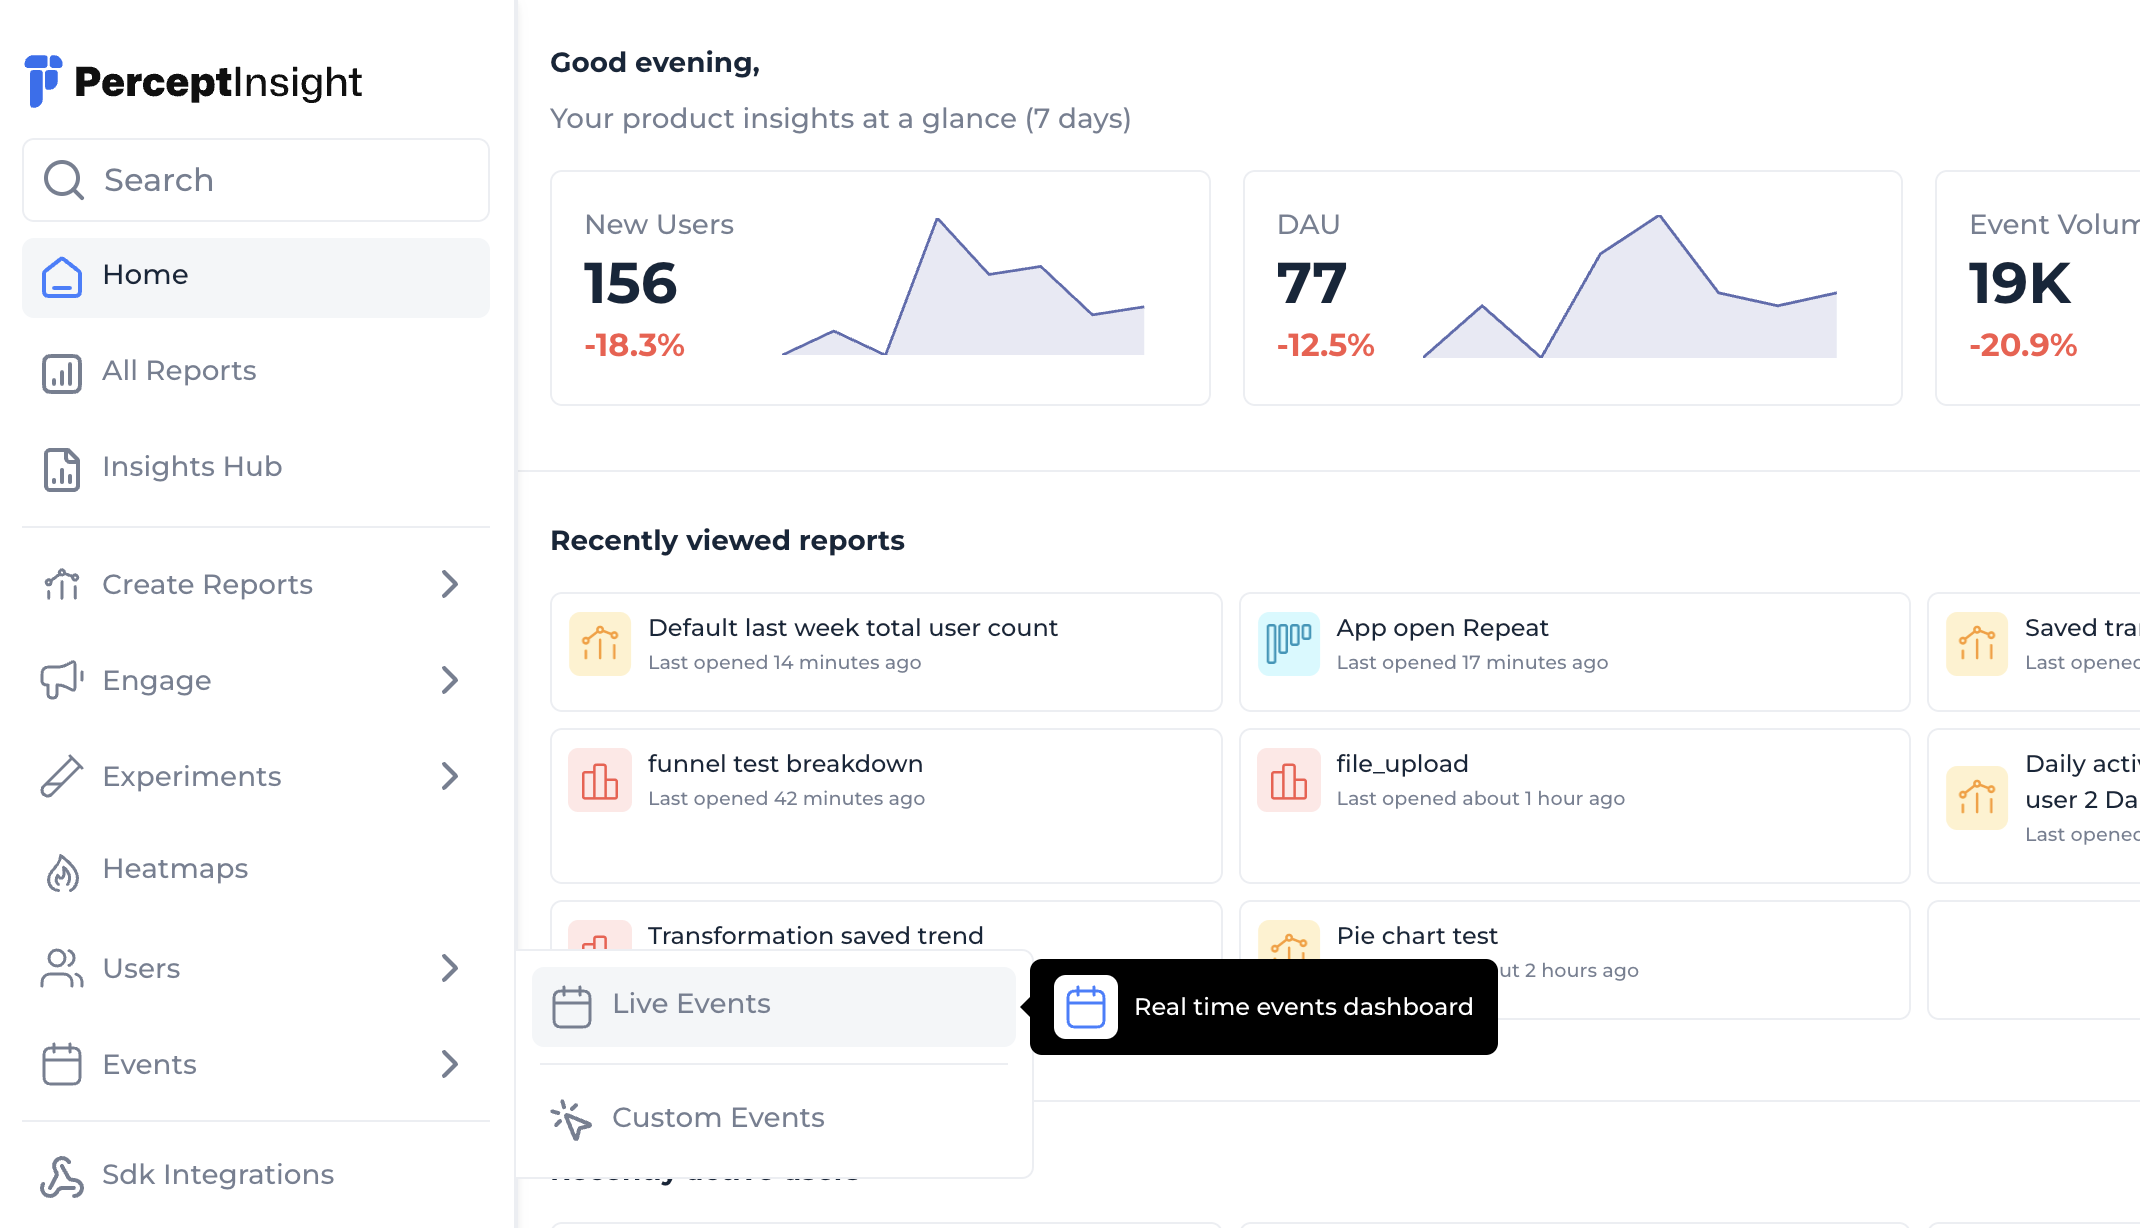
Find the Screen View event:

Expand it to find the Screen View details:
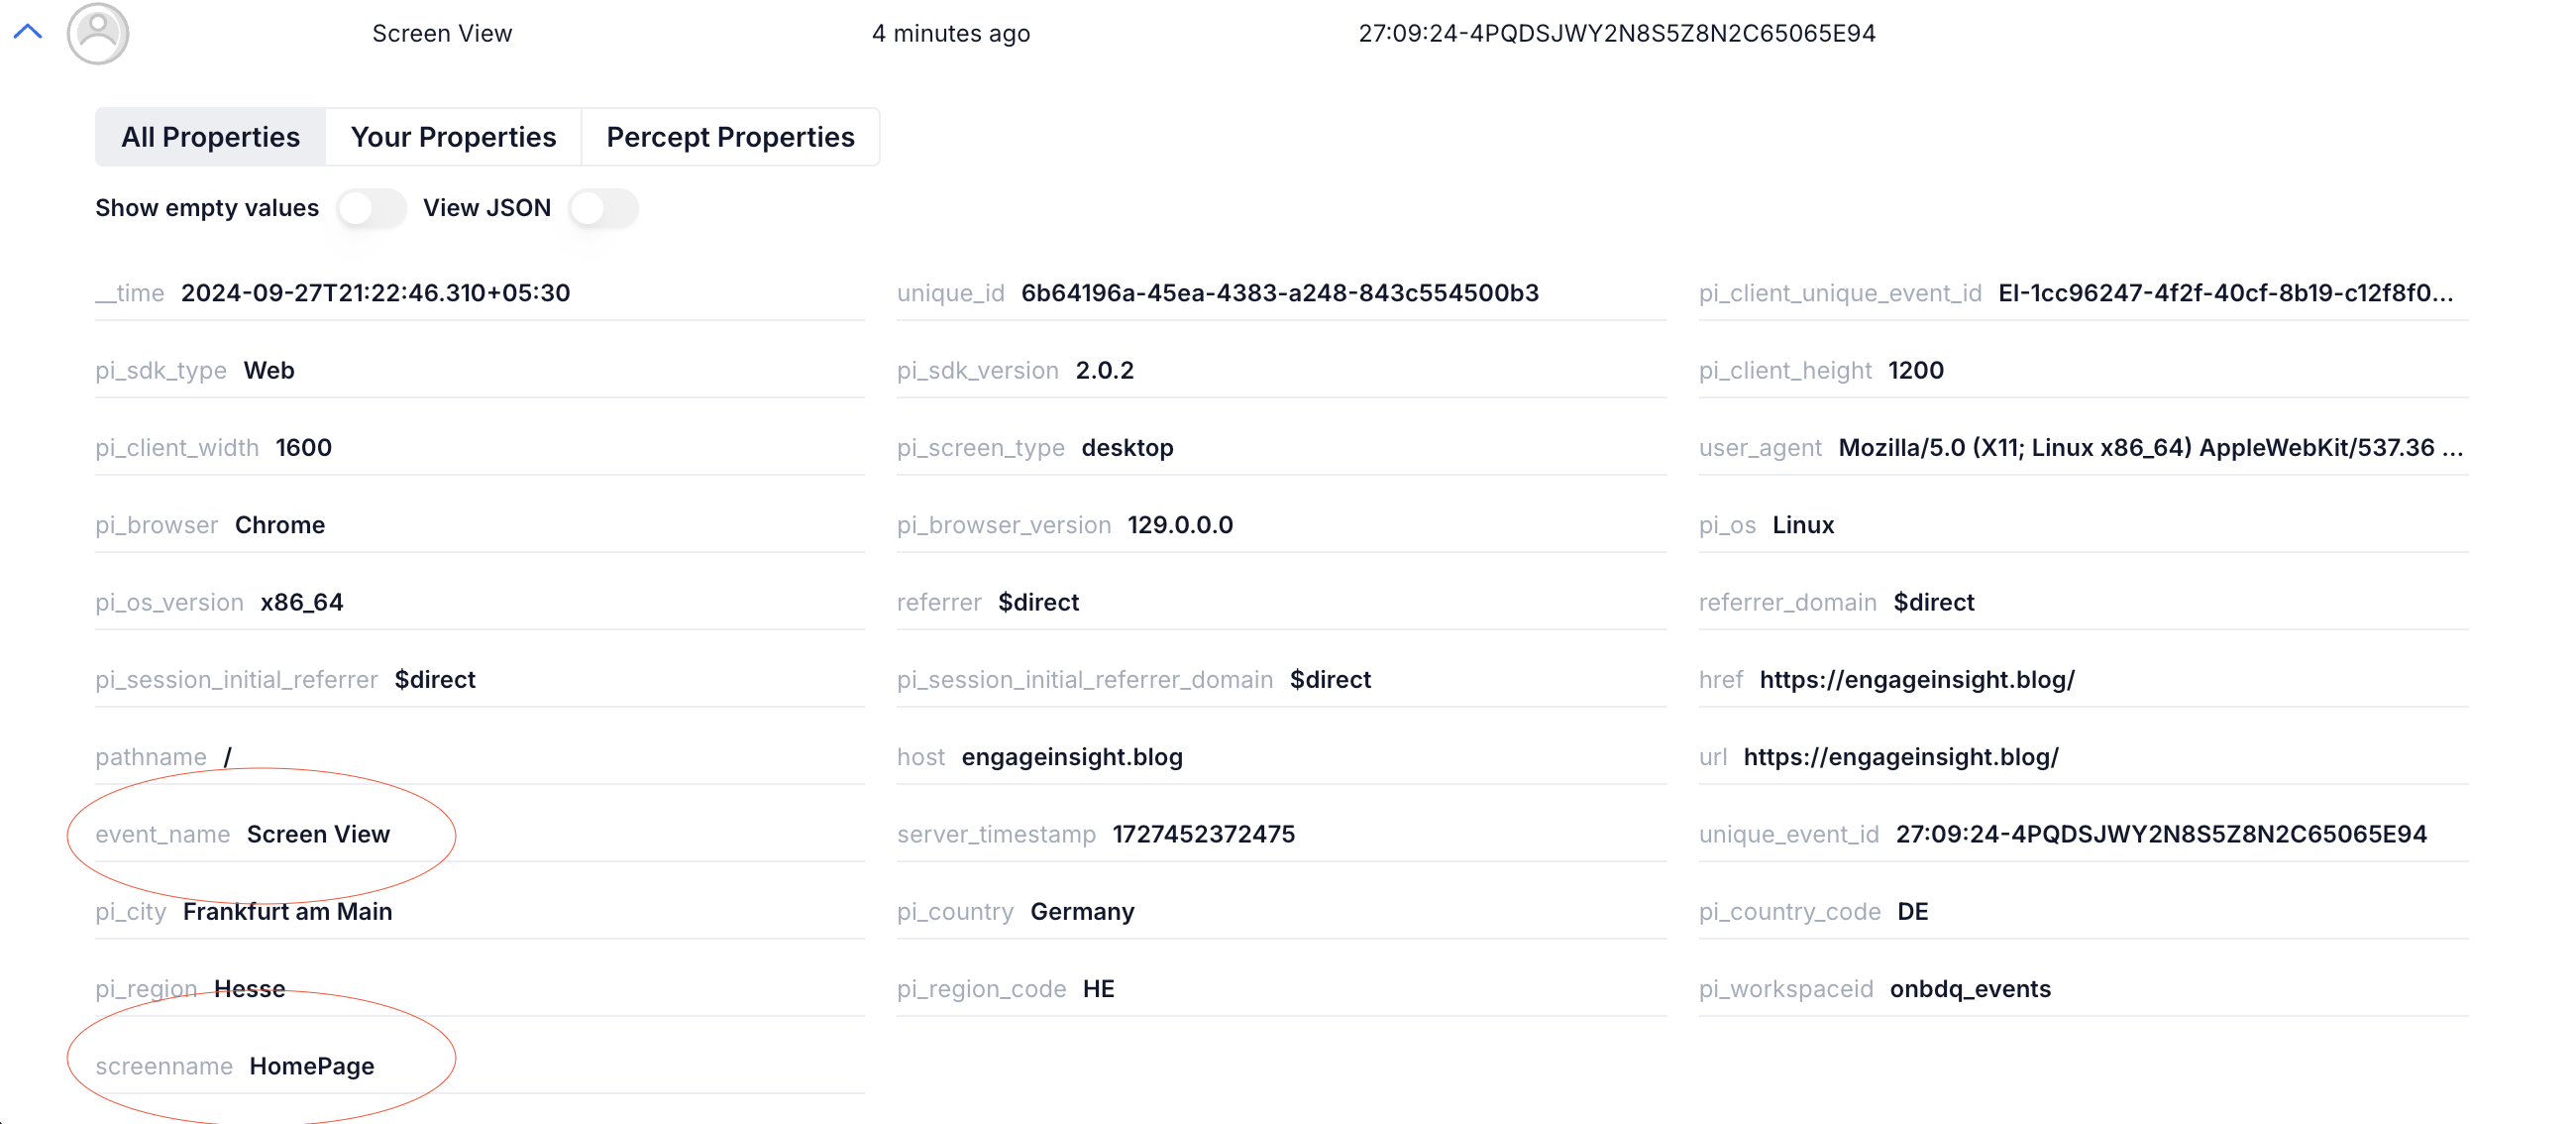
If you see the details, you have successfully started capturing screen views. 🙂